

Hello there
While working on temperature monitoring projects. The first choice about the sensor might be Dht 11 or LM35. These are low cost and easy to use sensors. The maximum range of these sensors is 50°C and 150°C respectively. Now the question is how to measure higher temperatures like the temperature of soldering iron tip. The answer is a thermocouple and this is max6675, an Arduino compatible thermocouple. We can measure temperature up to 1024°C using this. So in this tutorial, we are going to see how a thermocouple works and how to make a simple temperature monitoring system using Arduino and thermocouple. So Let’s gets started with this tutorial

working of thermocouple
A thermocouple is a device which is used to measure temperature. It is made from two different metals joined together to form a junction. When the junction is heated or cooled, a small voltage is generated in the ends which can be measured, and this voltage corresponds to temperature. so we can measure this voltage and calculate the temperature using a microcontroller.
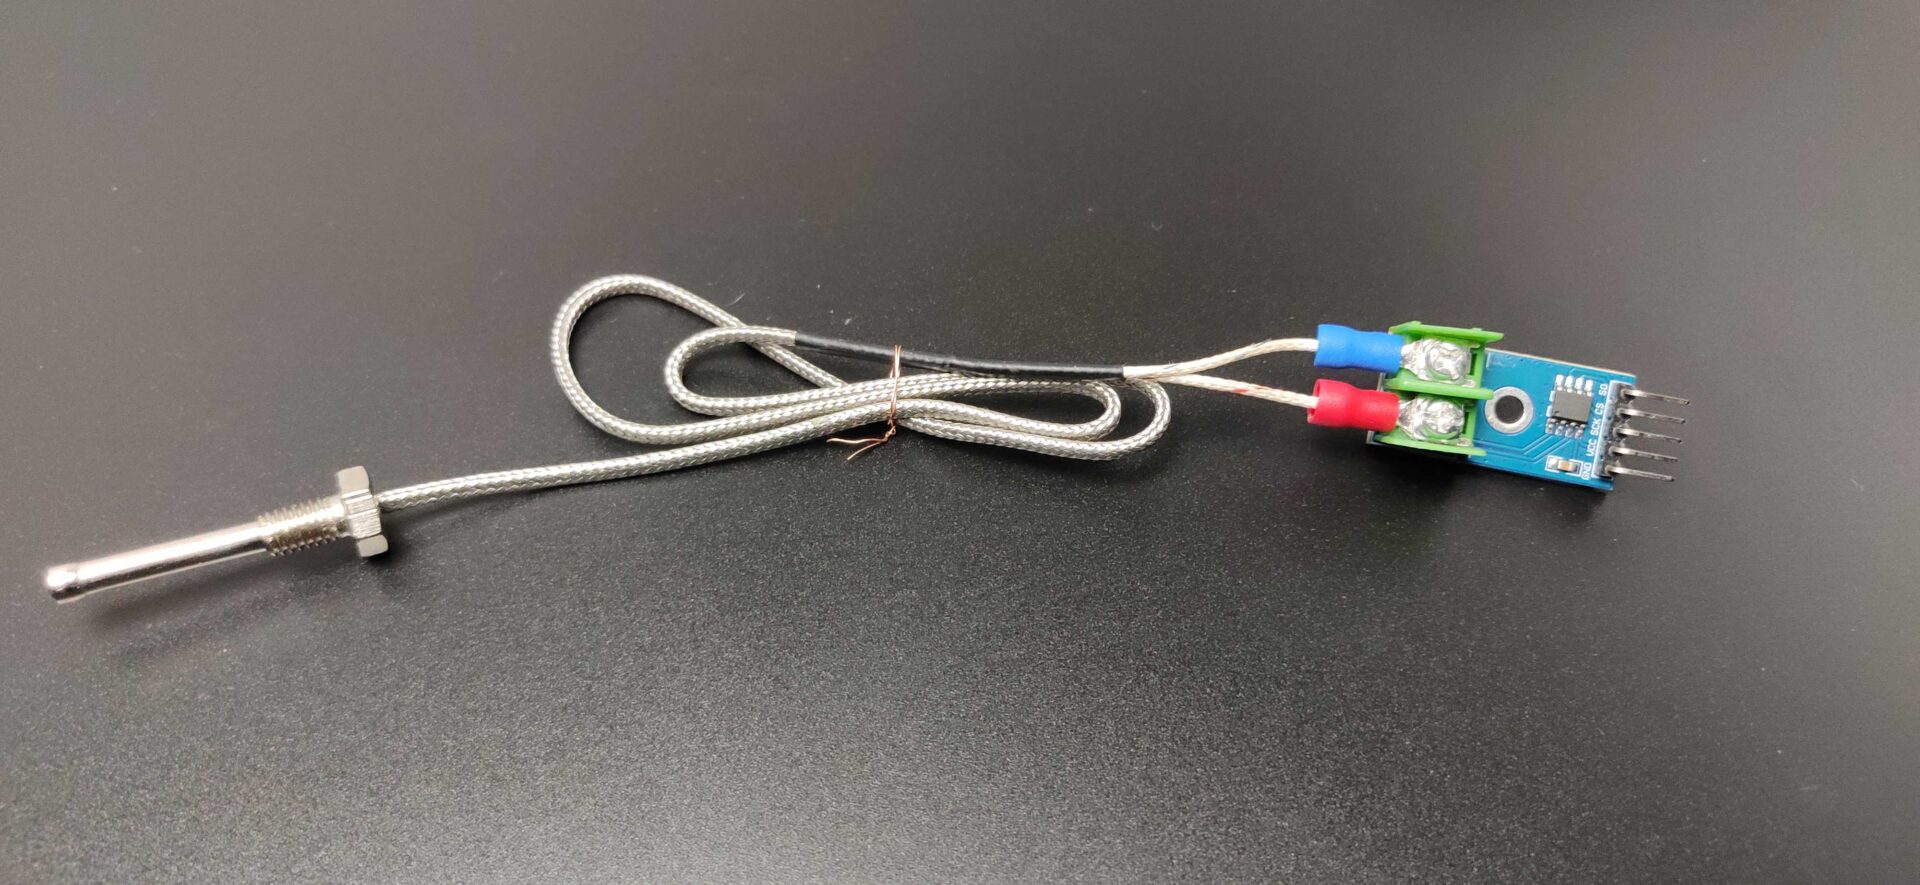
MAX6675 thermocouple
The MAX6675 performs cold-junction compensation and digitizes the signal from a type-K thermocouple. The data is output in a 12-bit resolution, SPI-compatible, read-only format. This converter resolves temperatures to 0.25°C, allows readings as high as +1024°C, and exhibits thermocouple accuracy of 8 LS
Now let’s see how to build the temperature monitor
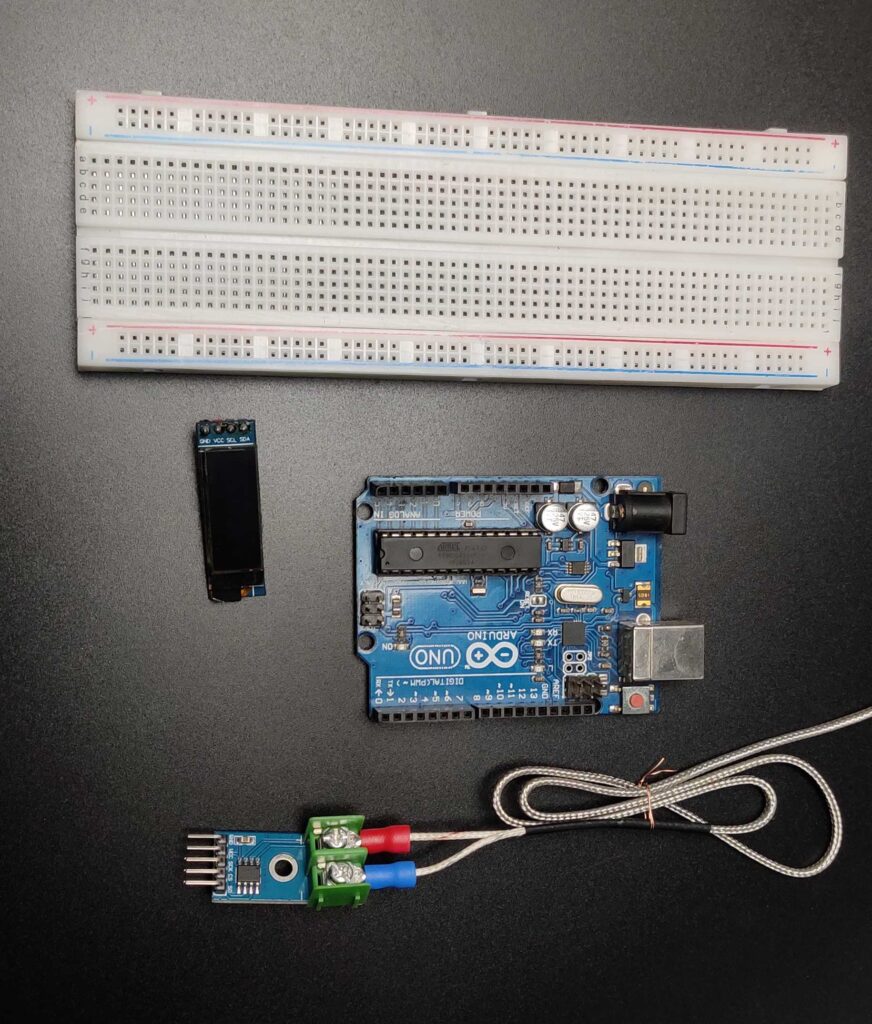
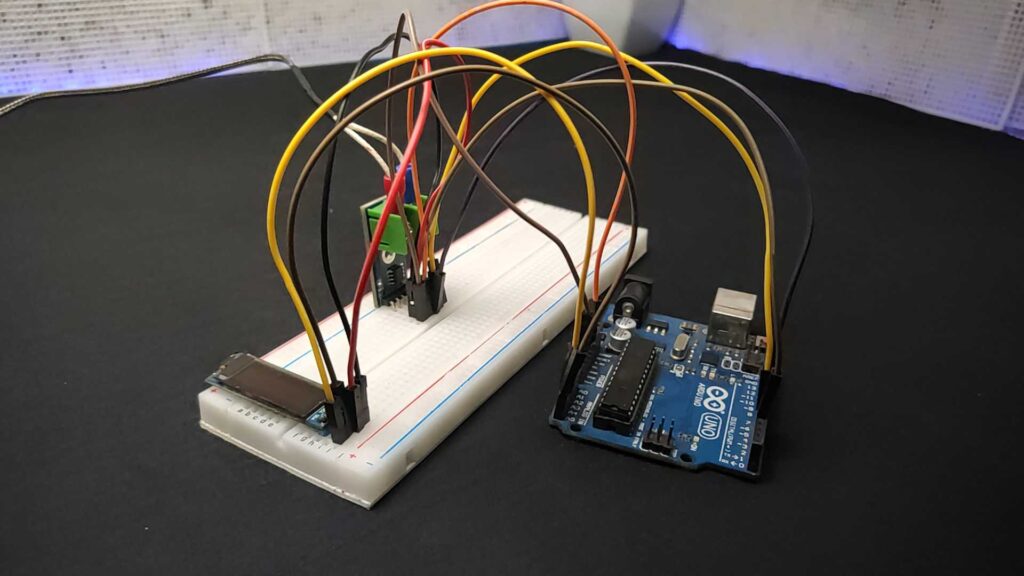
Components needed
max6675 thermocouple *1
Arduino*1
128*32 OLED*1
breadboard*1
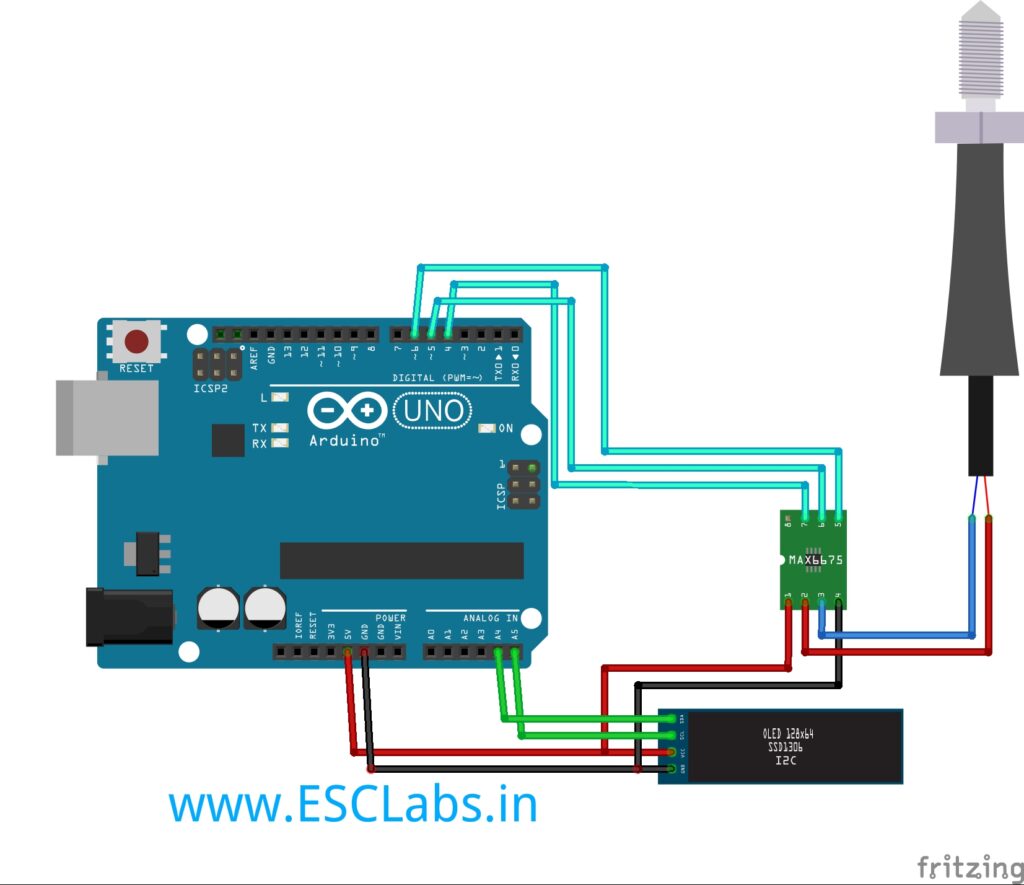
CIRCUIT DIAGRAM
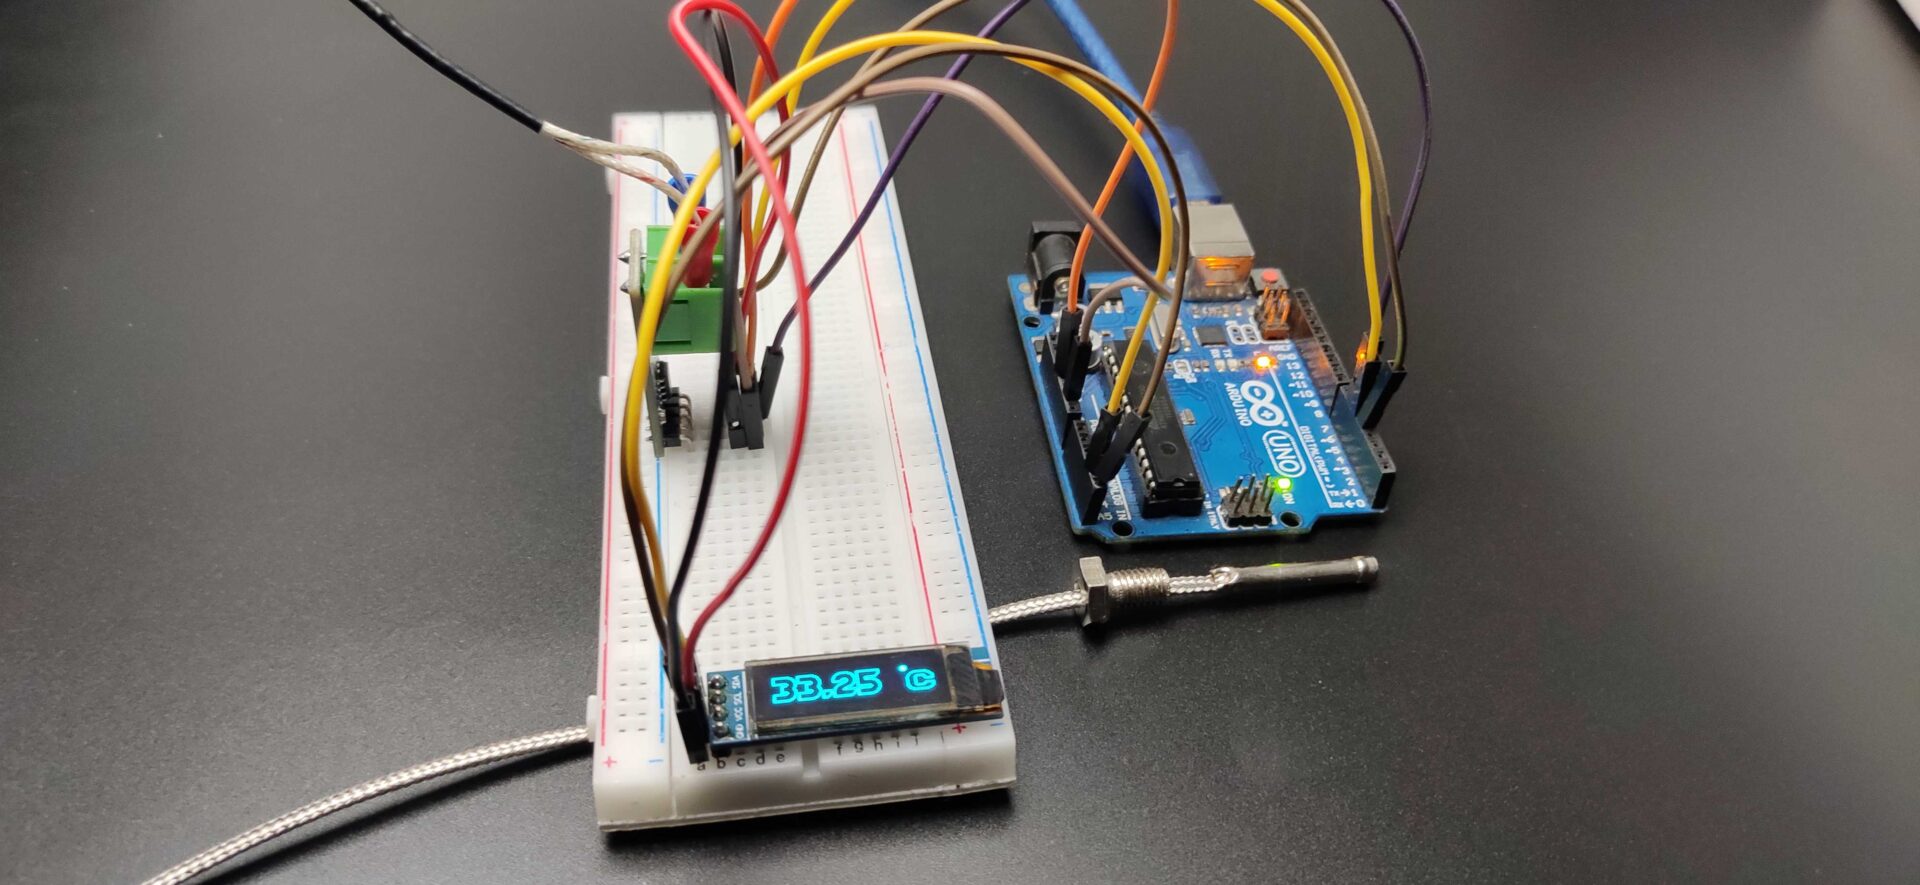
After grabbing all components I placed the OLED display and thermocouple on the breadboard then I connected the VCC and grounds of both modules to Arduino. Next, I connected the i2c pins of OLED to Arduino which is SDA to A4 and SCL to A5. Finally, I connected the max6675 SO pin to D4 CS pin to D5 and SCK to D6. That’s all about connections.
PROGRAMMING
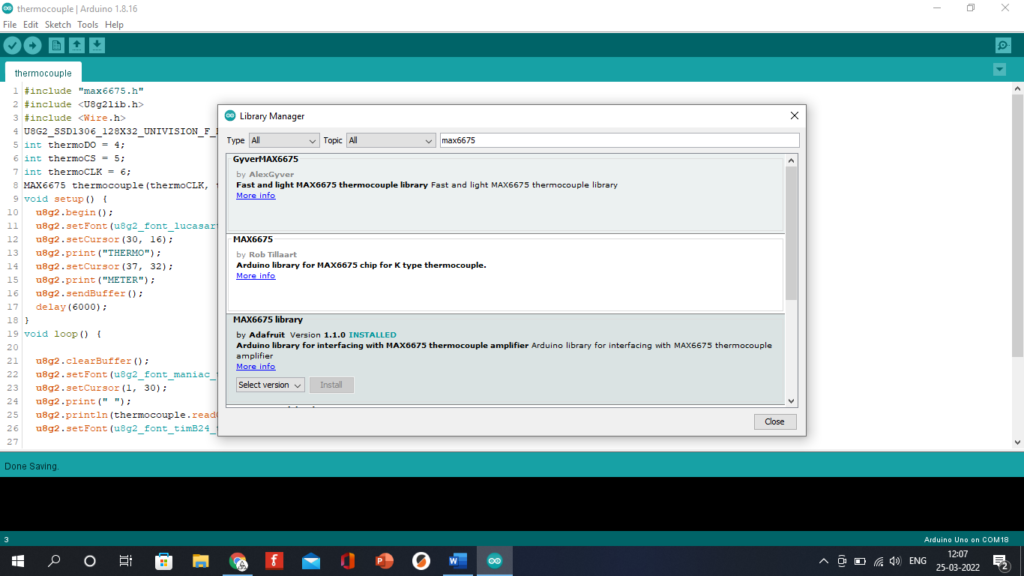
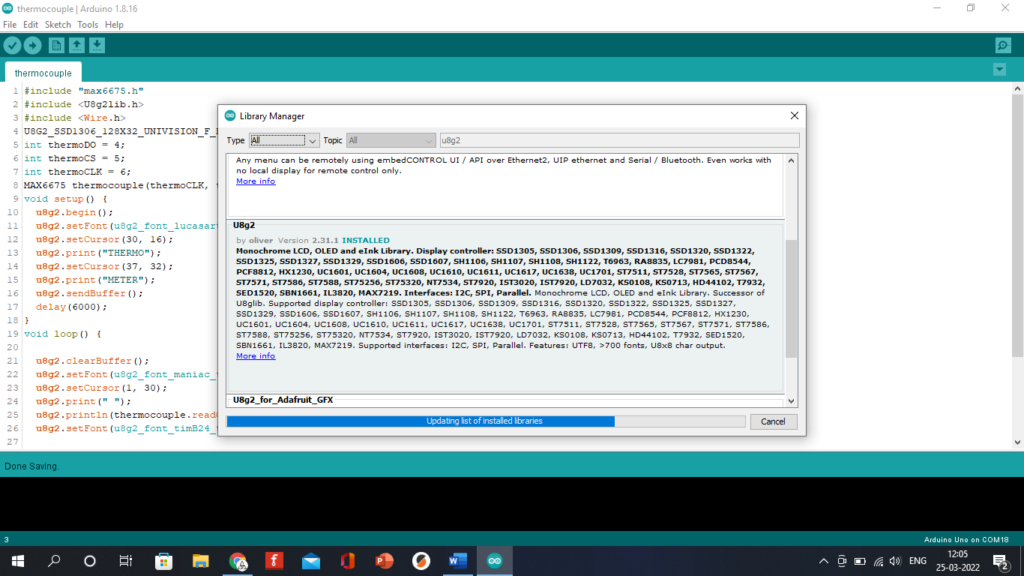
Now I connected the Arduino to the laptop via USB cable. So this is the code. You can download this code from our website. To upload this code you have to install two libraries first so go to sketch then include library and manage Library now first search for U8g2 and install then install max6675 library. After that upload the code to Arduino and that’s it. now select the board and port and upload the code. after uploading Now see the working.
download code from here
You can measure up to 1024°C with this module and that’s enough for almost any application. So that’s all about today hope you enjoyed and learned something new from my tutorial if so please like share and subscribe that’s all up to you. I will see you next time.


Leave a comment