


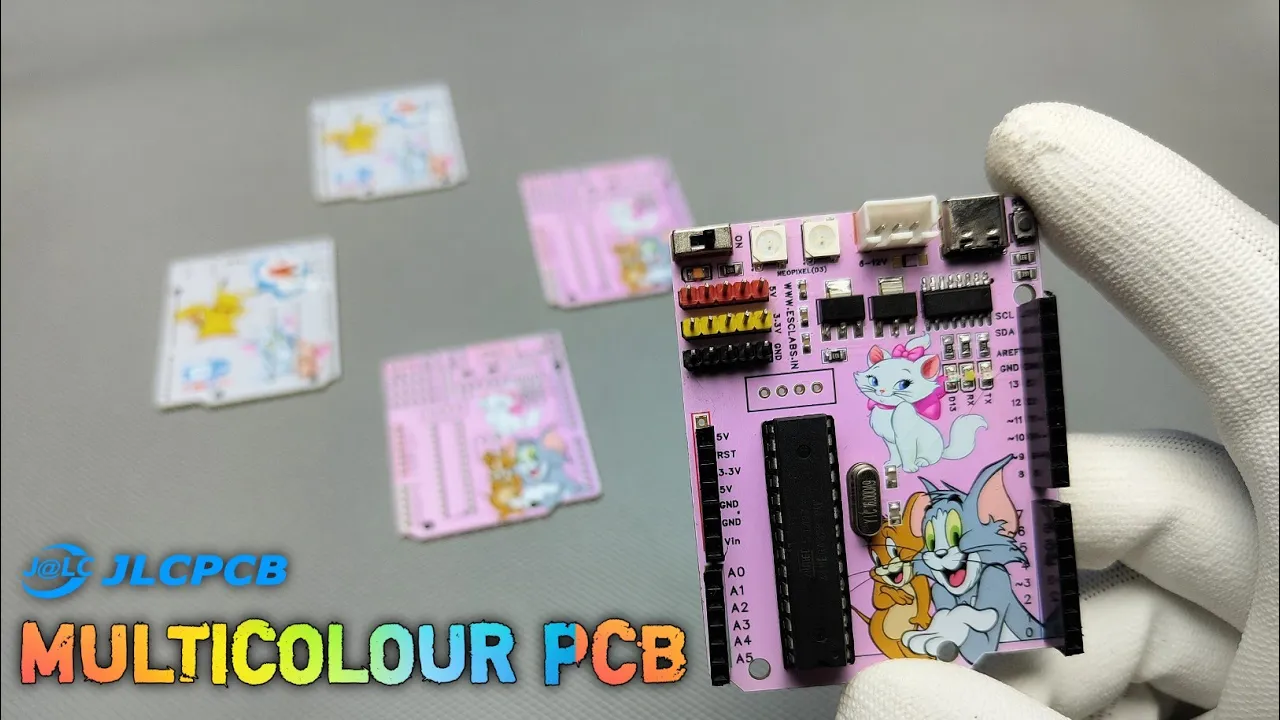

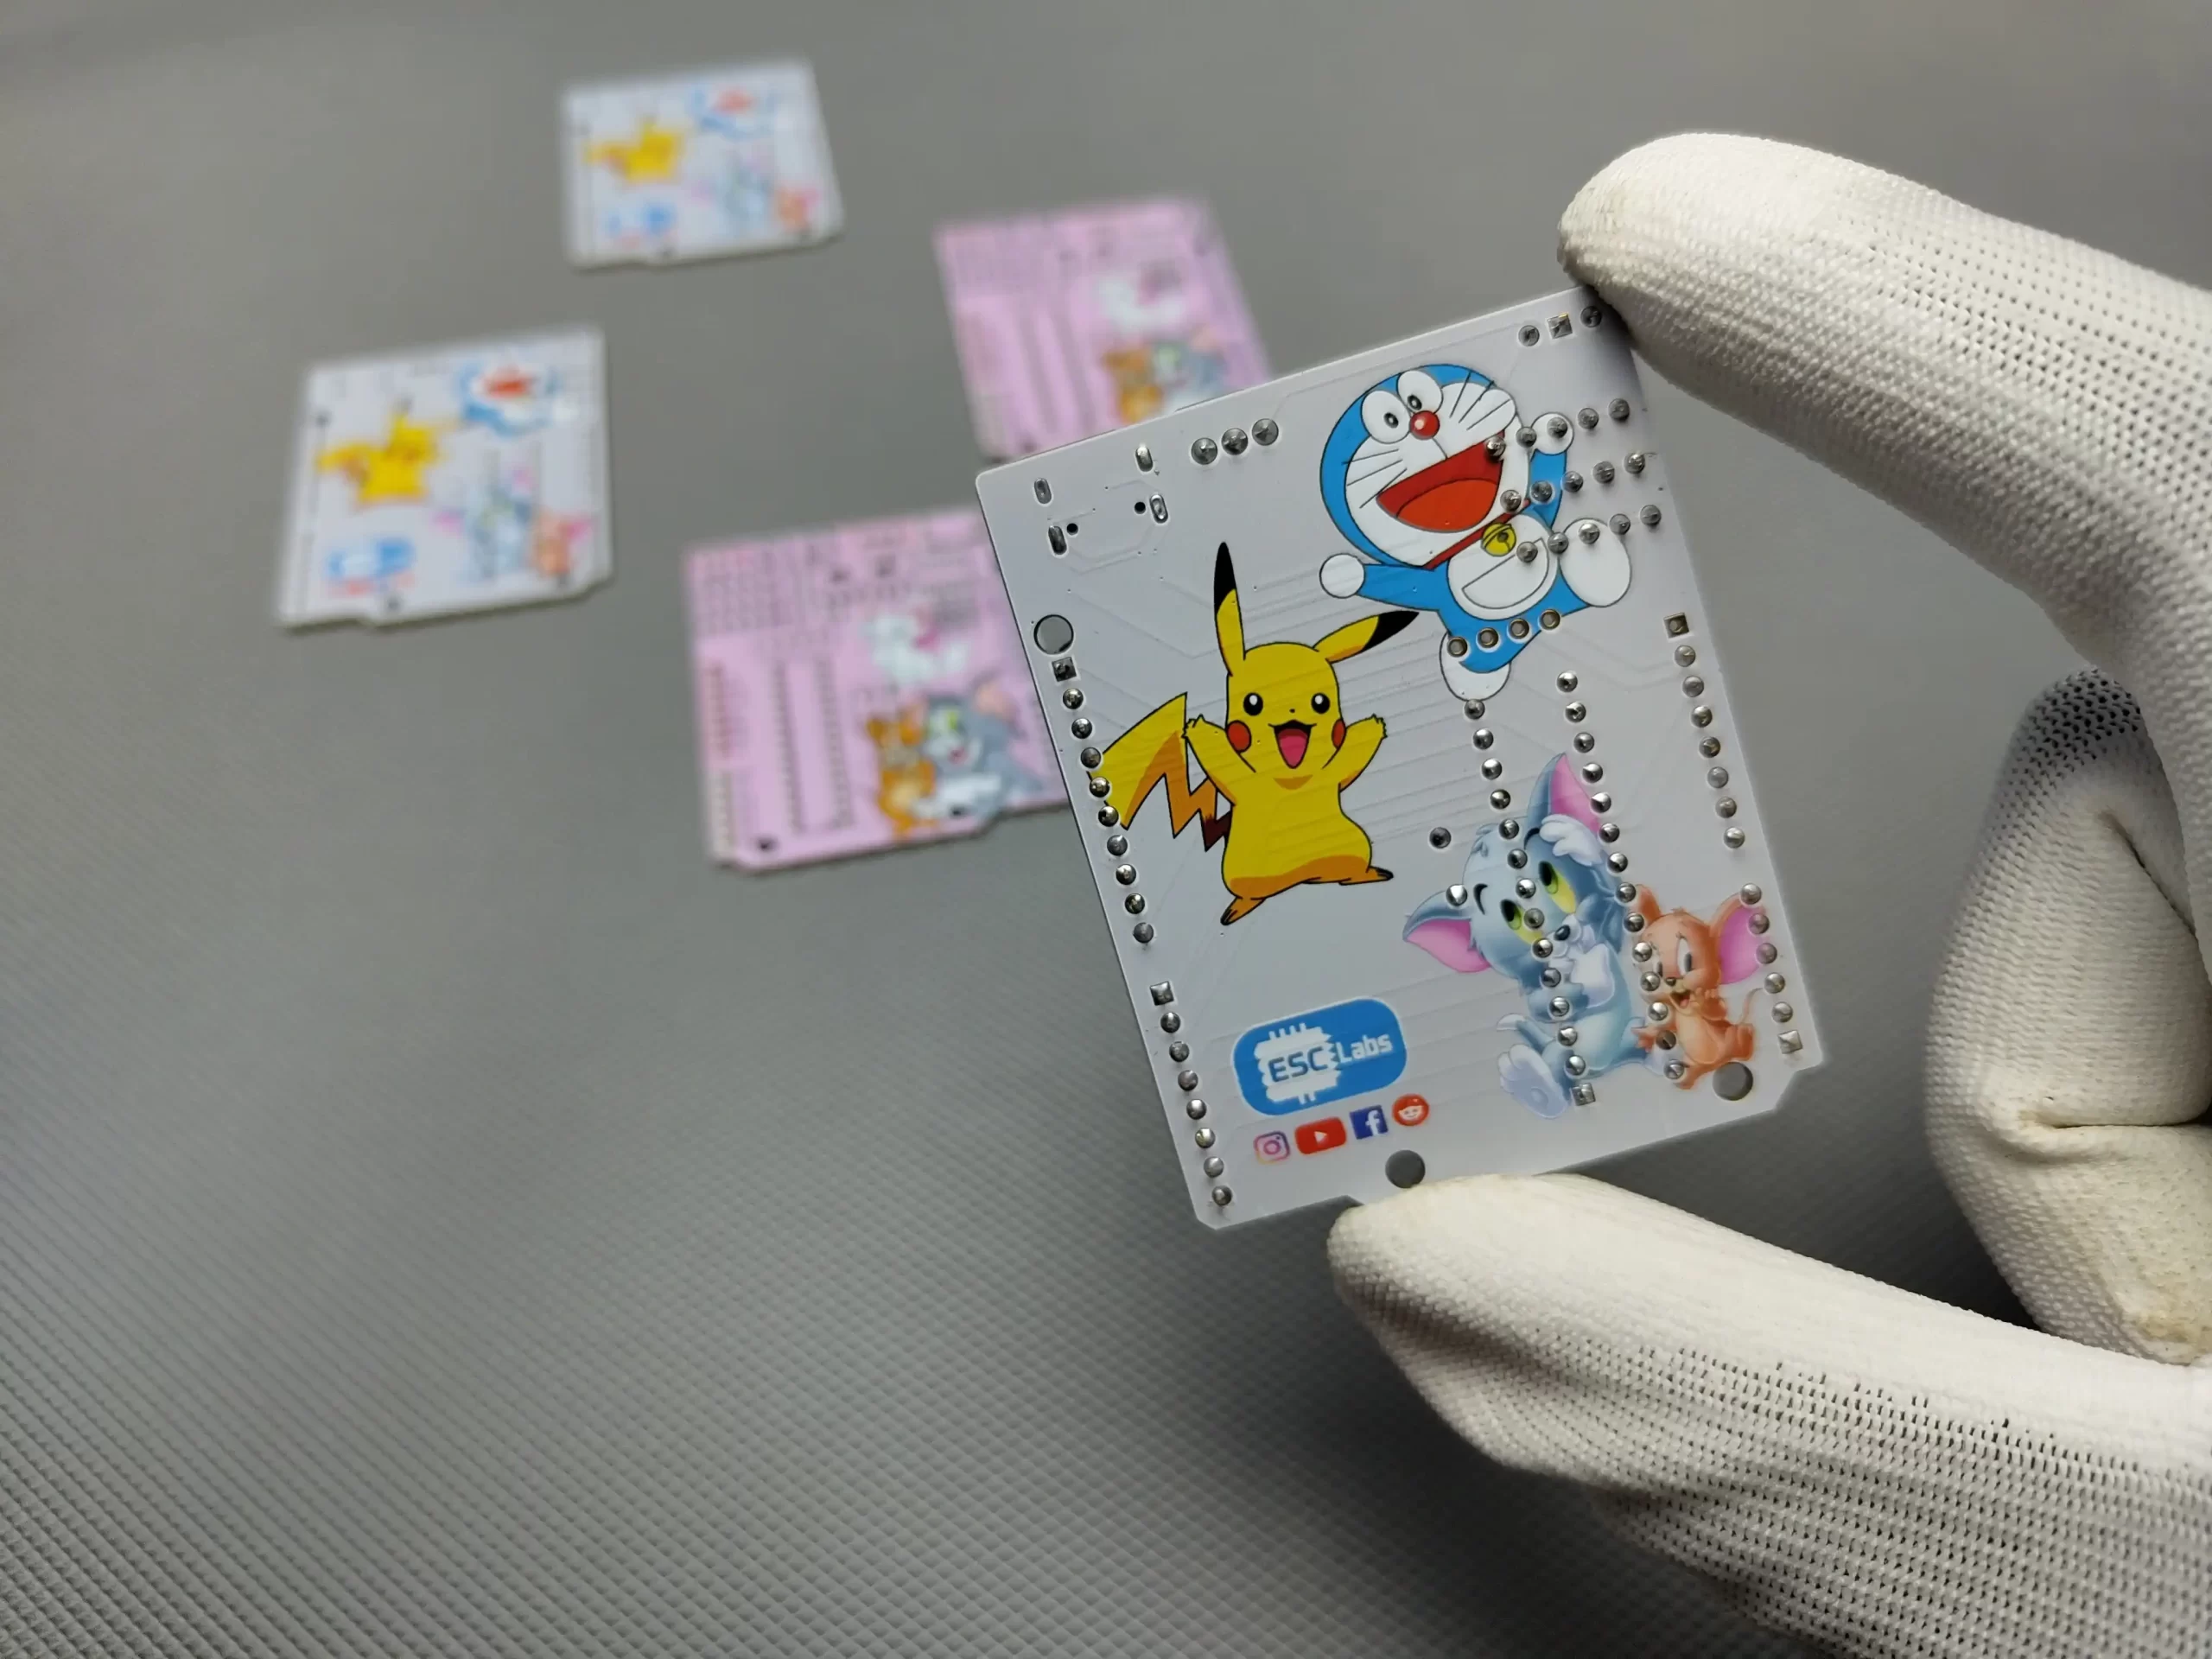
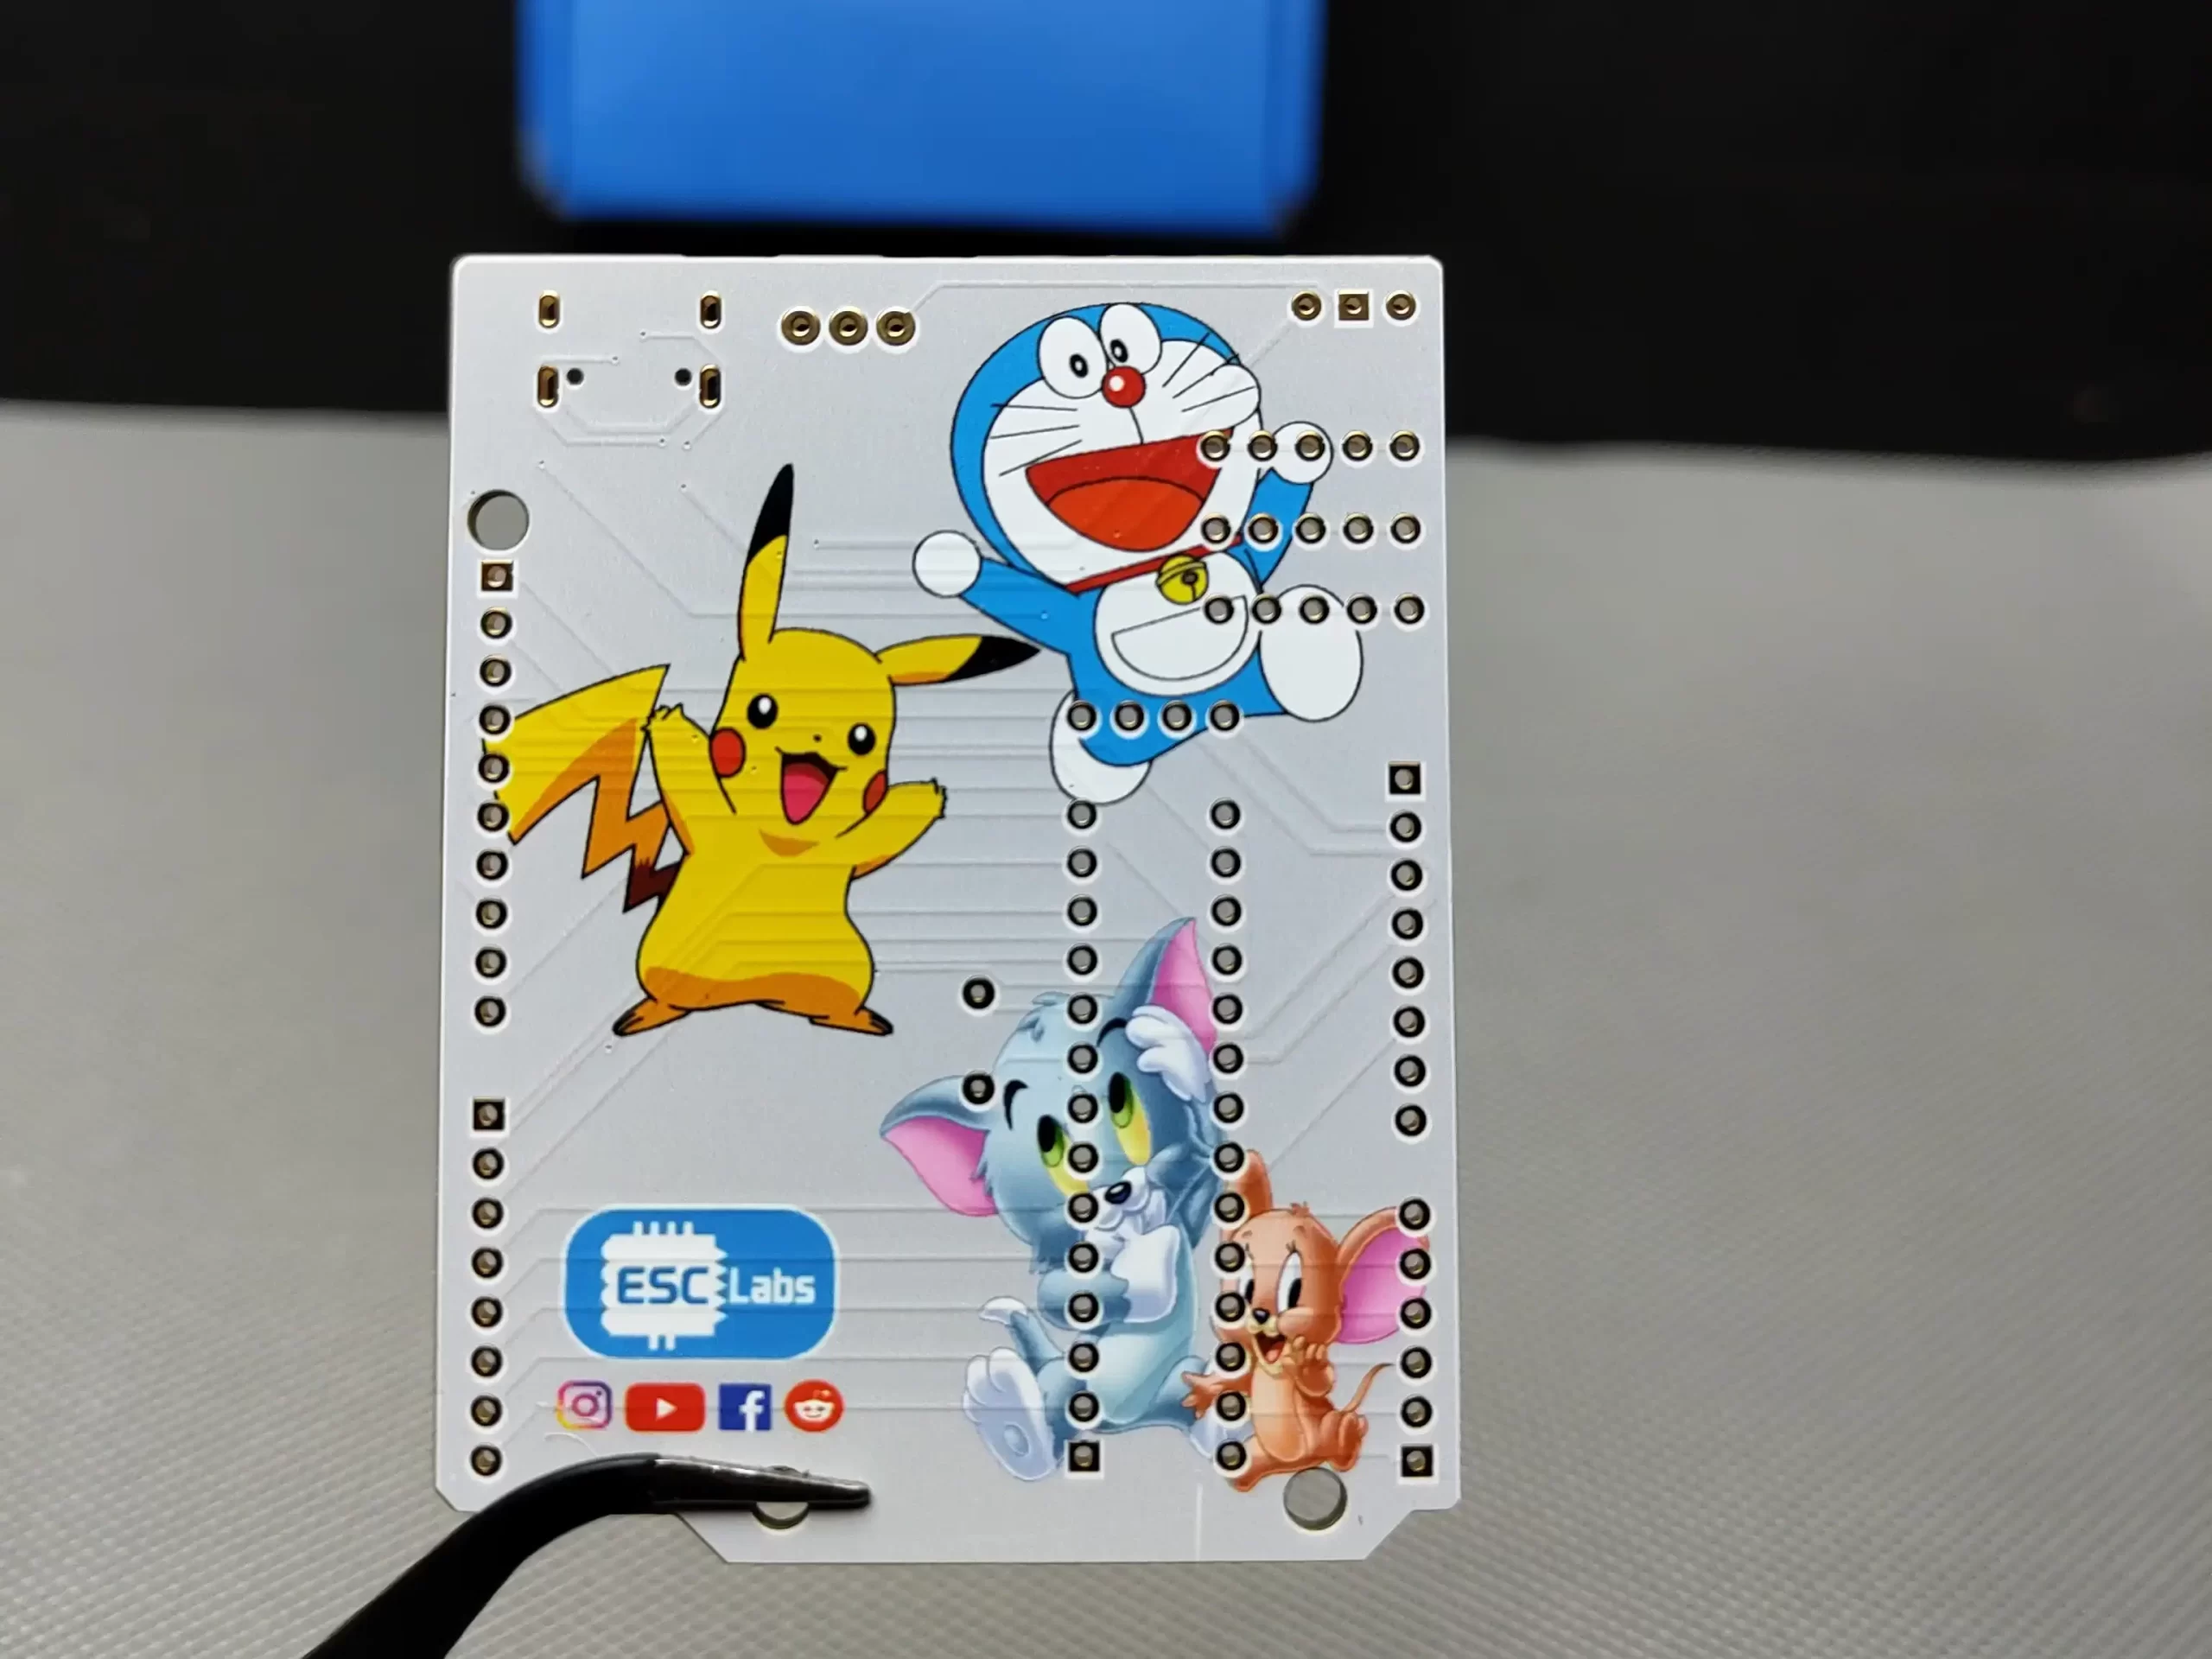
I love PCBs and I already made different-sized, different coloured, different shaped PCBs, Ordering a designed PCB from jlcpcb is very easy. But have you ever seen a multicoloured PCB or PCB with a coloured image on it.? Here is it. An Arduino with famous cartoon characters, yeah this is a PCB with multi-colour silkscreen. I made it using JLCPCBs new multicolour silkscreen printing service.
Multi-color Silkscreen, also known as Full-color Silkscreen PCBs or Full-color PCBs, multicolour PCBs, is an innovative printing technique used in the manufacturing of printed circuit boards. Traditionally, PCBs have a single-colour silkscreen layer, often limited to white or black, for labelling component placements, logos, and other important information. However, Multi-color Silkscreen takes this to a whole new level by allowing the incorporation of multiple colours onto the PCB surface. This means that intricate designs, vibrant graphics, logos, and even images can now be accurately reproduced on the silkscreen layer of the PCB. It adds a visually captivating element to PCBs, making them more than just functional electronic devices but also works of art. With Multi-color Silkscreen, designers and engineers can unleash their creativity, enhance brand identity, and make their PCBs truly stand out in terms of aesthetics and visual appeal. So in this article let’s see how I did it. Let’s get started.
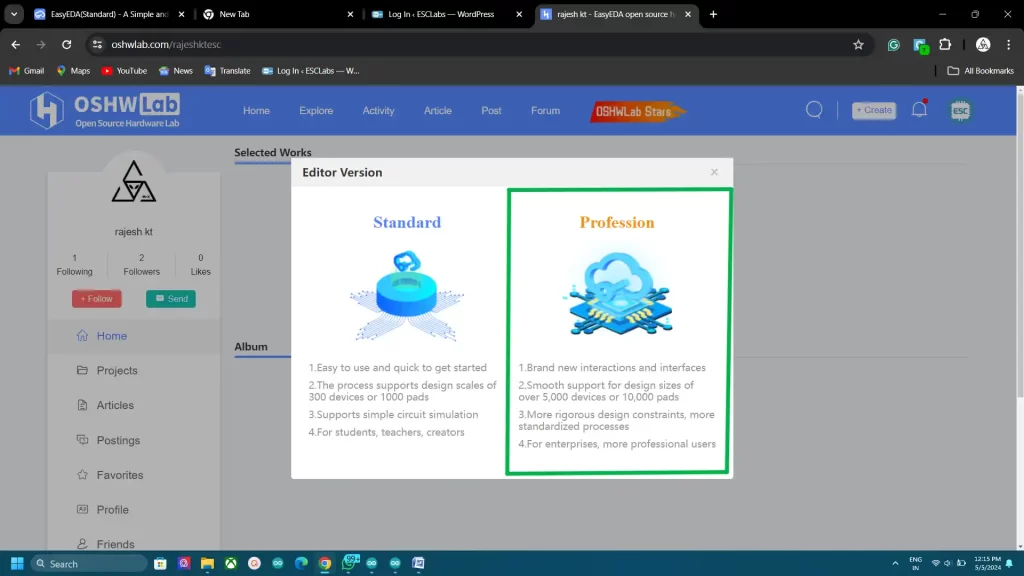
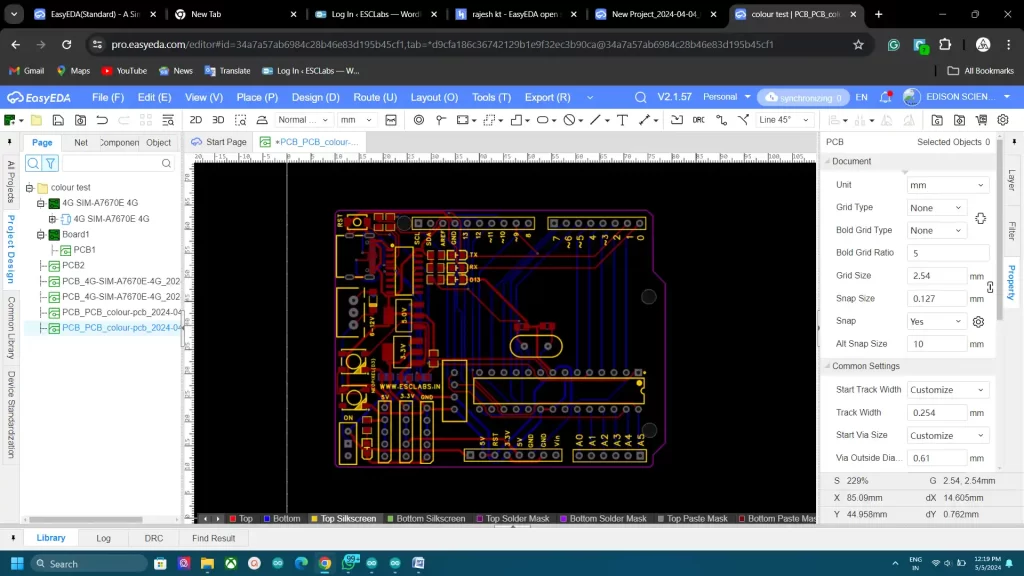
So first we need to design the PCB with colour silkscreen. For that go to easyeda.com and select the professional version. Unfortunately, this feature is only available on the pro version but fortunately, the pro version is also free. Now in the editor we can design our PCB just like the standard version.
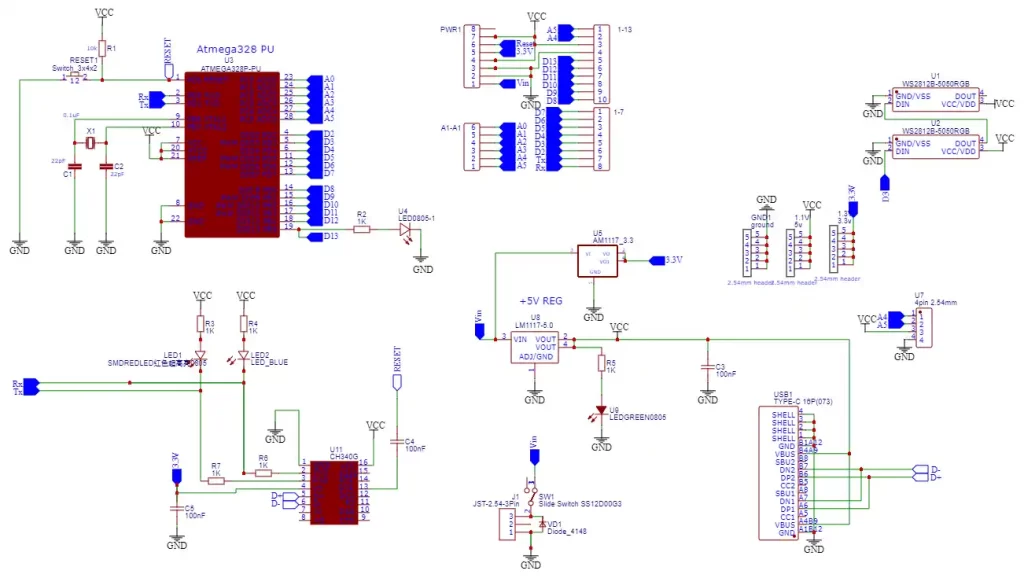
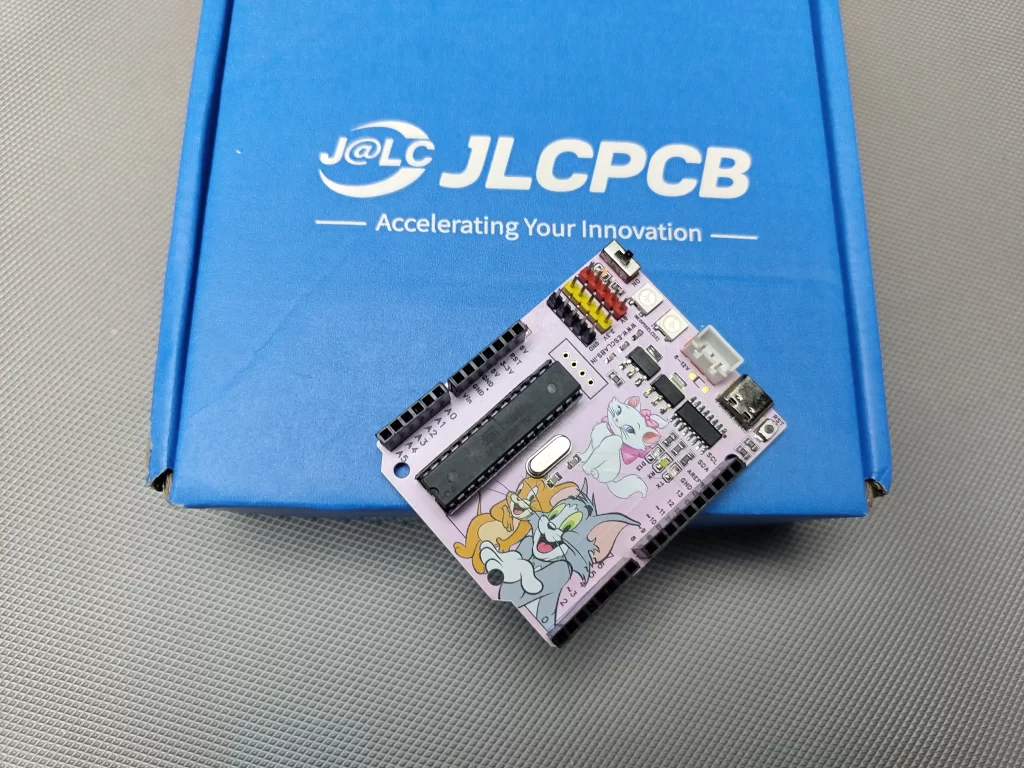
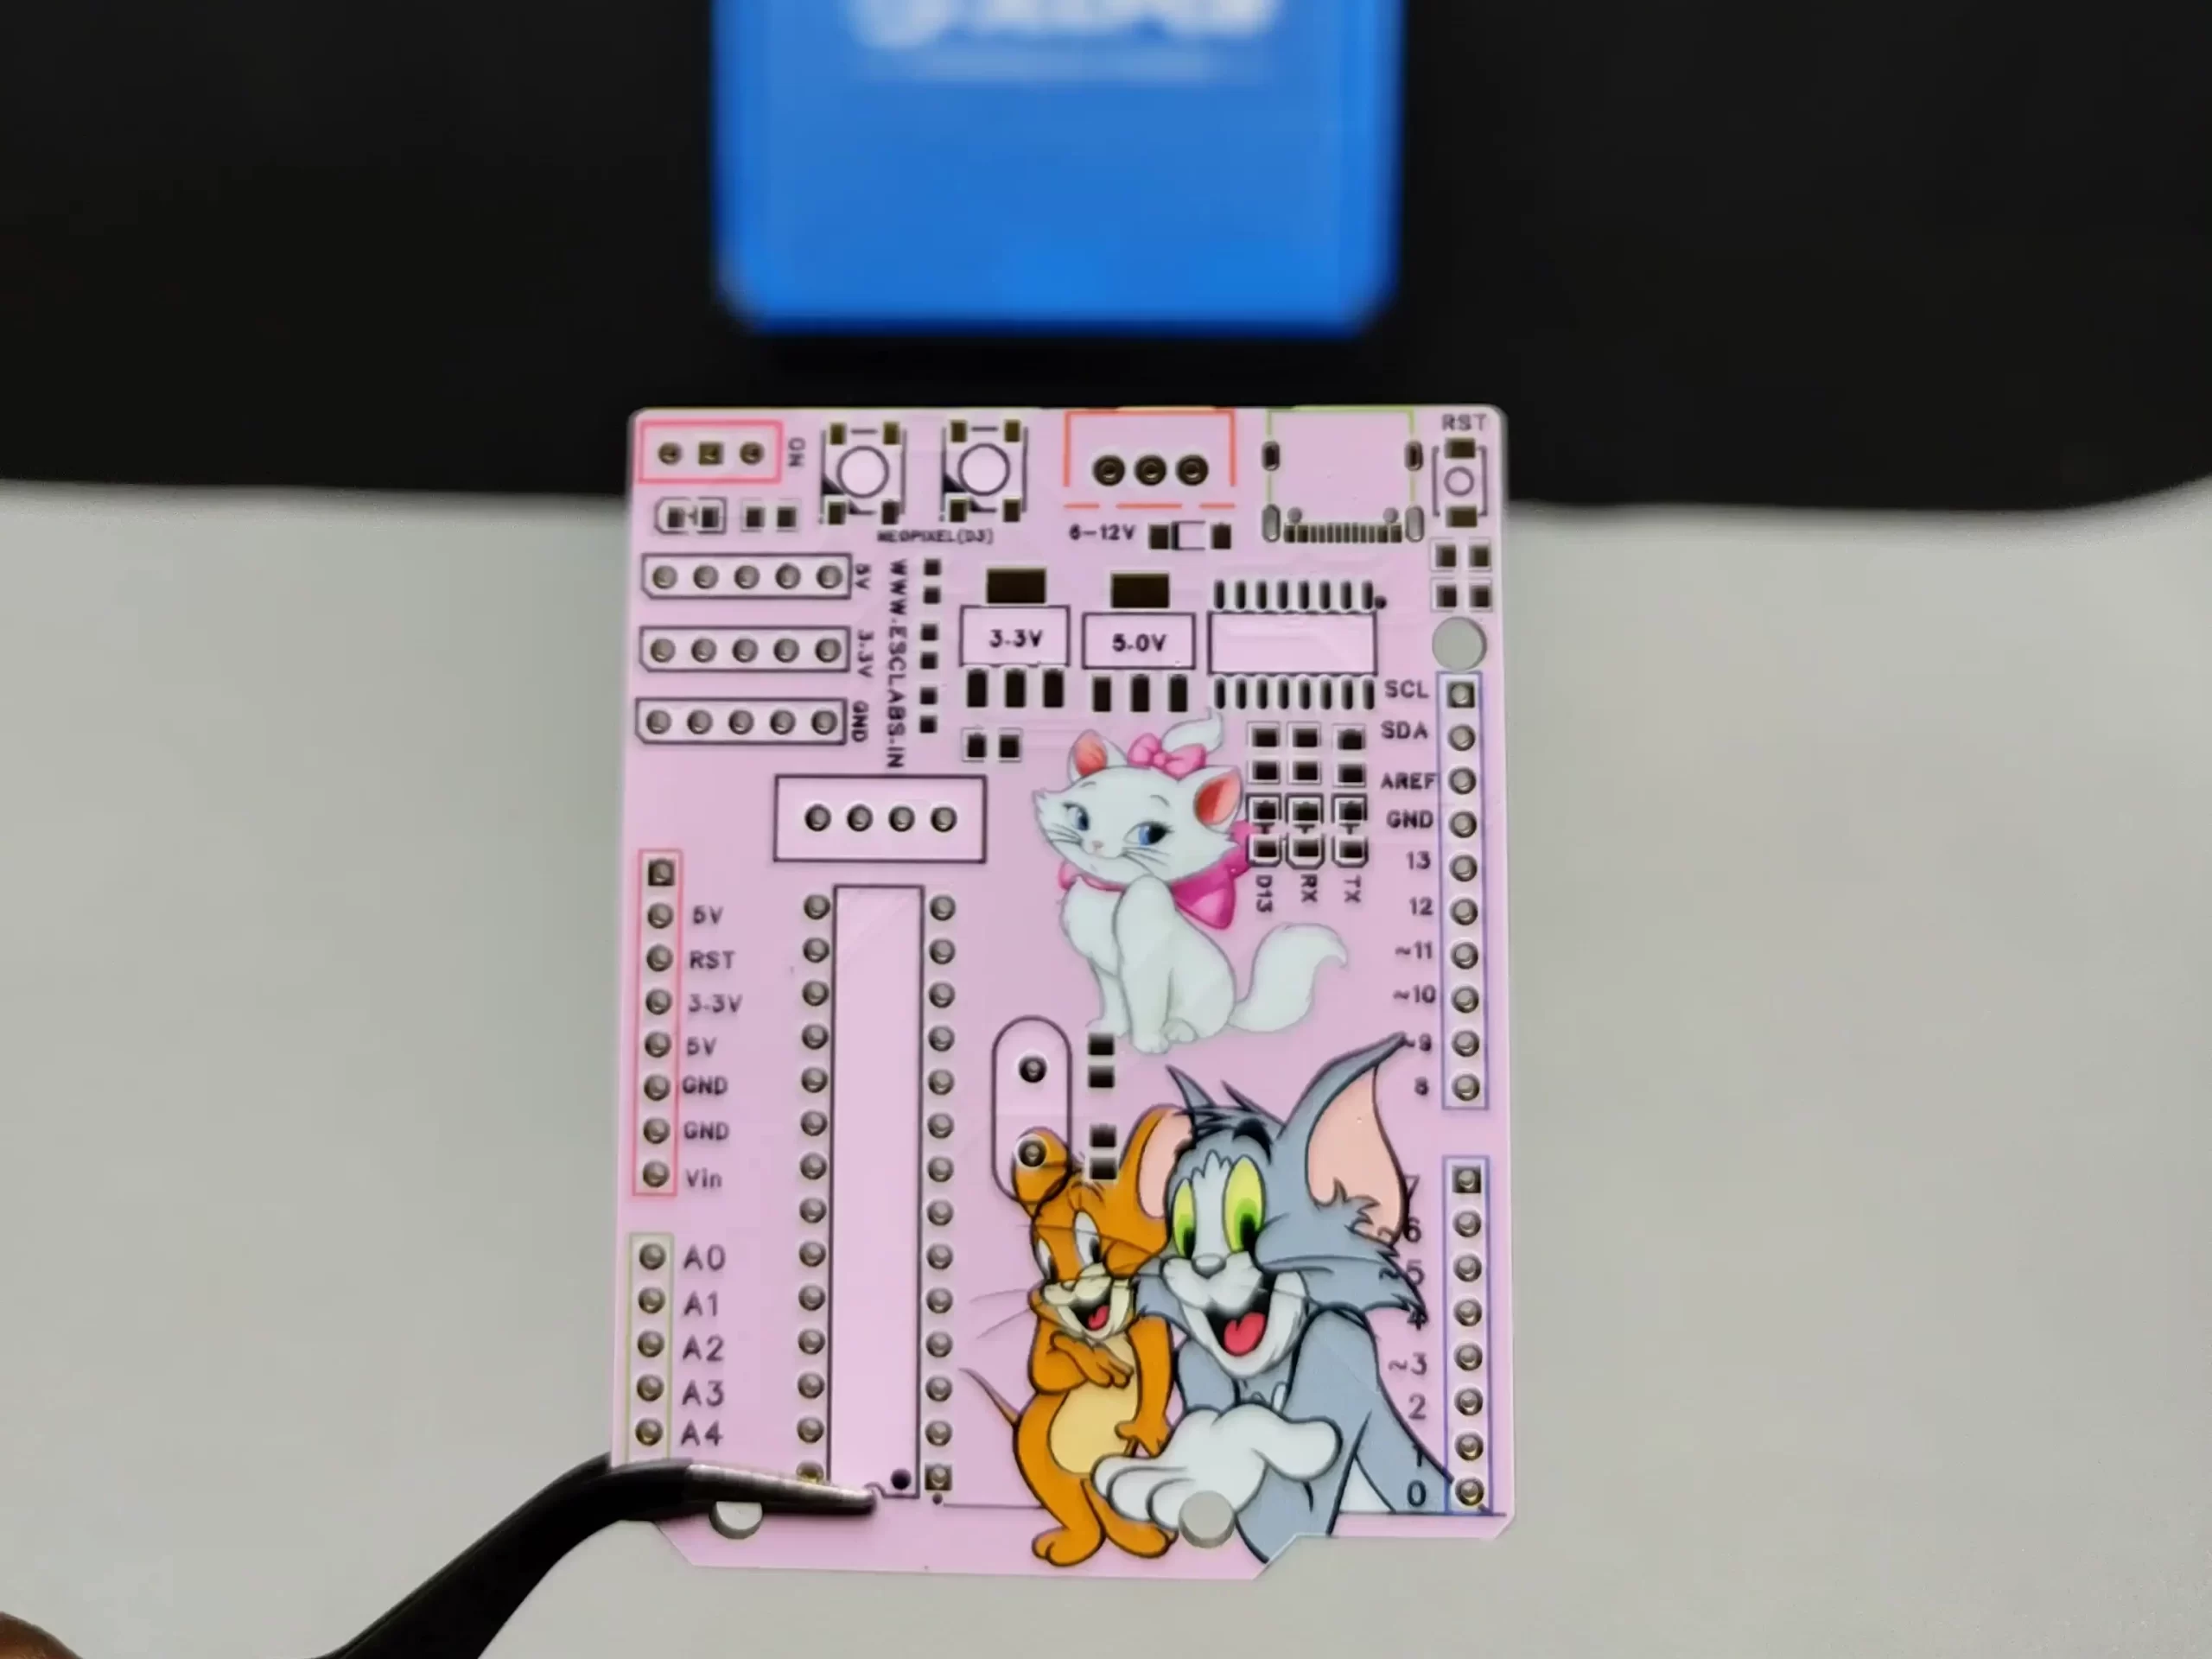
Using this circuit diagram I designed the PCB. This is a simple Arduino board. I have used DIP ATMEGA328 and included a USB type C port, 2 neopixel LEDs and I2C connector etc.
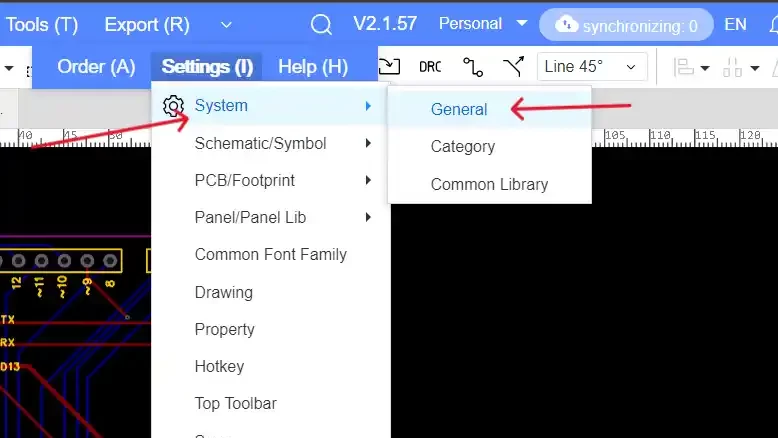
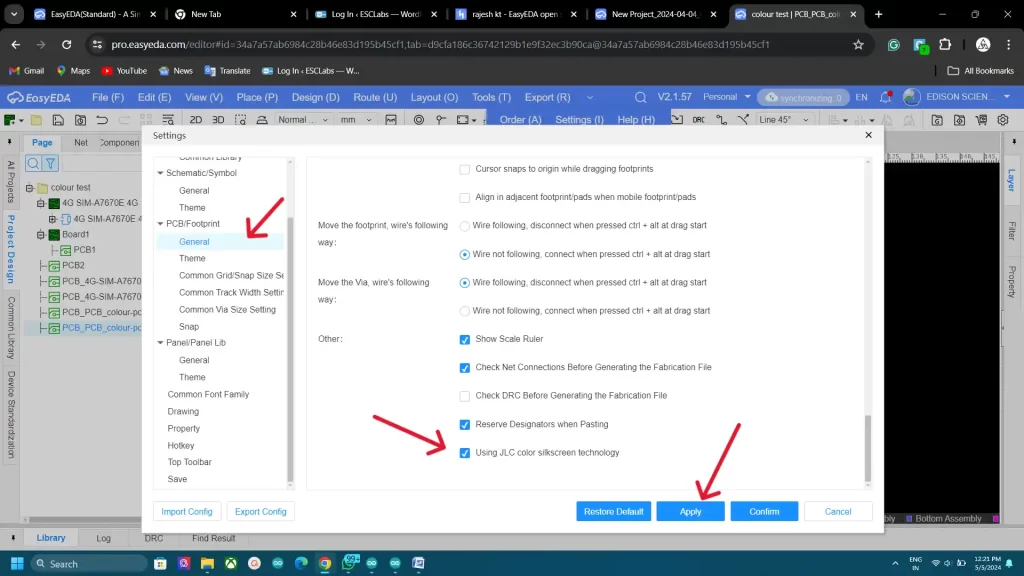
Here comes the part that you are looking for. First, go to the settings –system– general. Now under the pcb/footprint select the general tab and tick jlc colour silkscreen technology click apply and confirm.
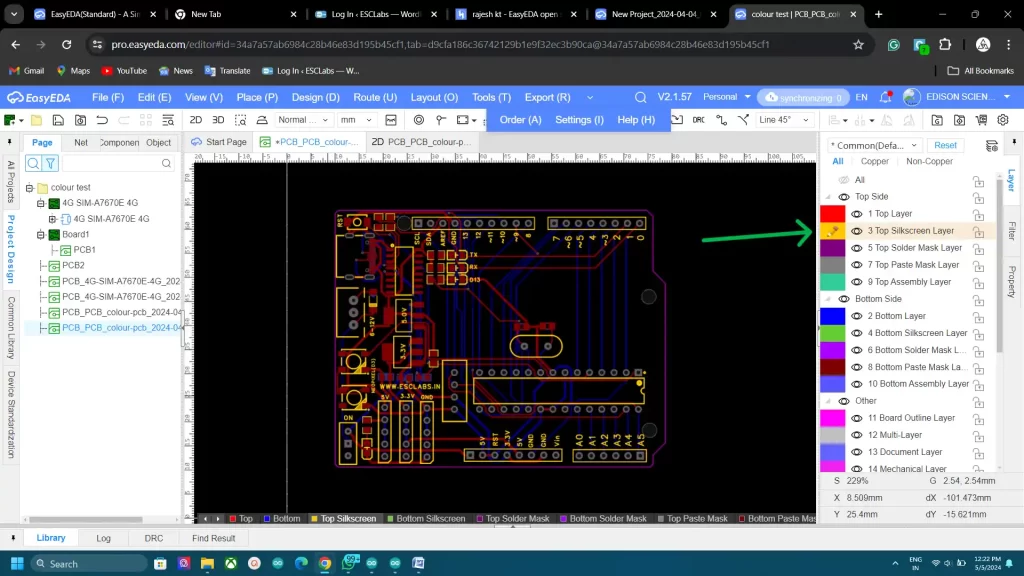
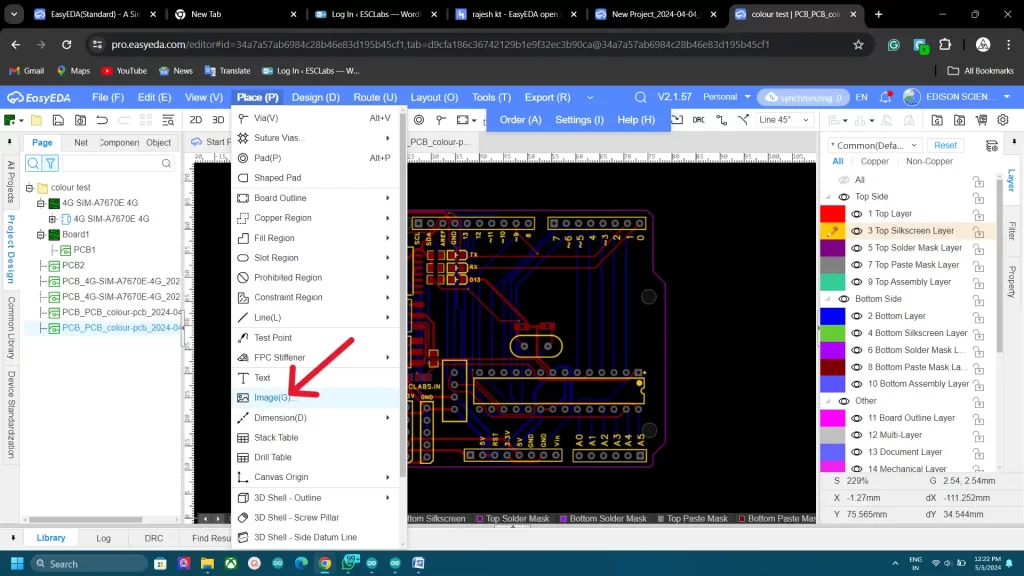
Next, select the layer-select the top silkscreen layer – then go to place and then select the image option.
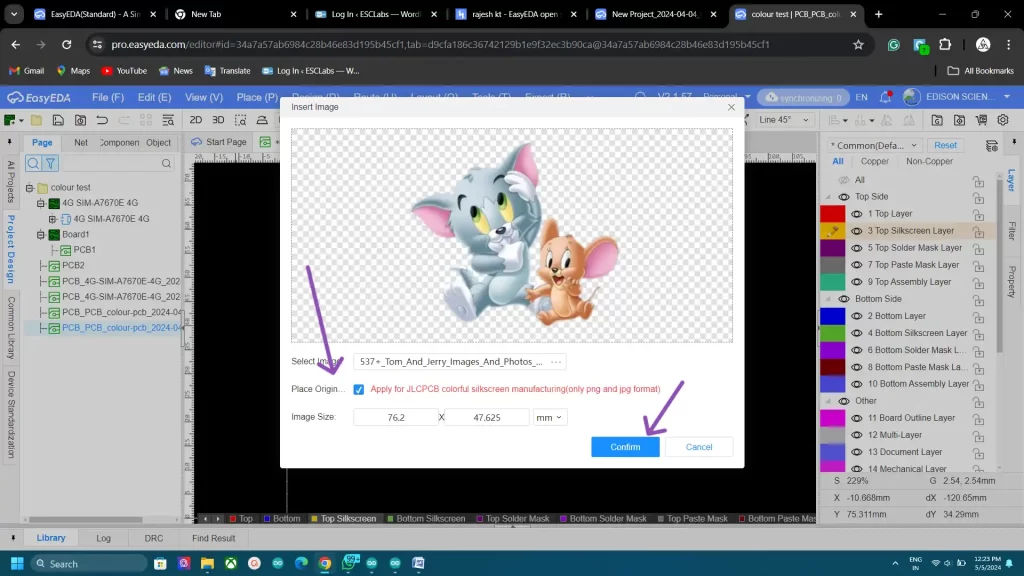
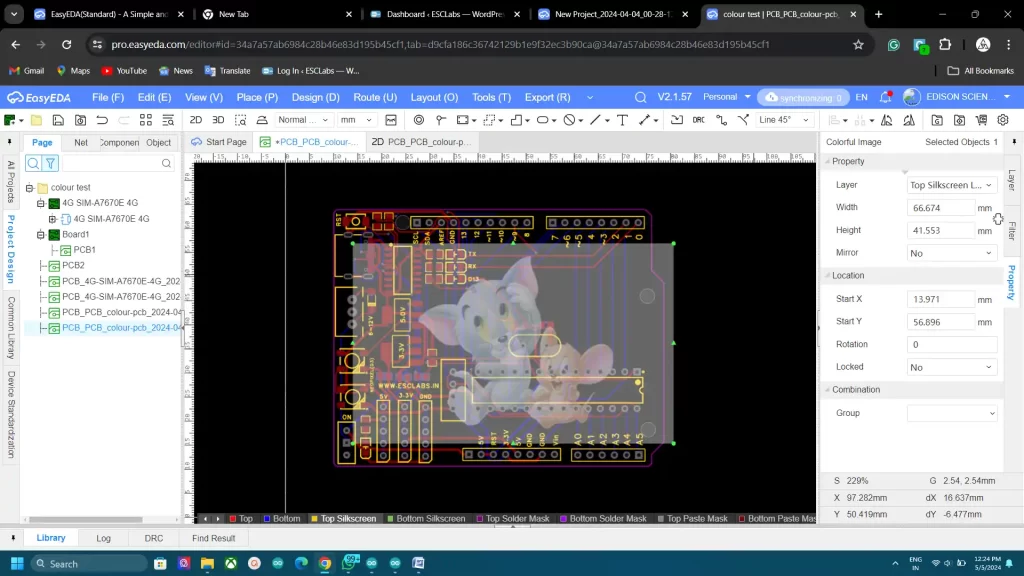
Now we can select the image. I selected the Tom and Jerry image, remember to use a backgroundless image. After selecting the image, here you need to tick on the jlc colour silkscreen option. Then we can place the image on our PCB. We can move and adjust the size of the imported image as you wish. In the same way, we can select the bottom silkscreen layer and add images.
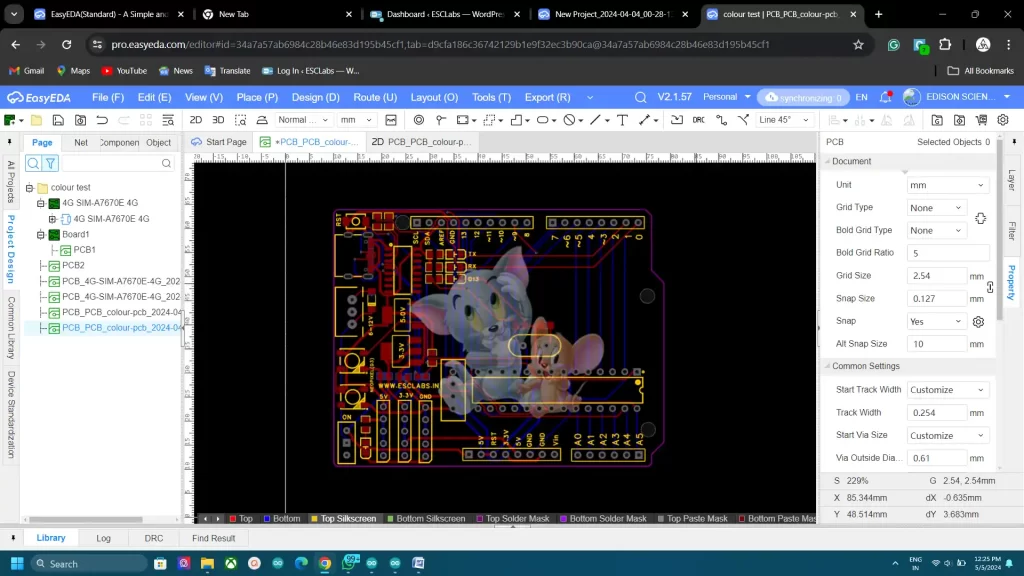
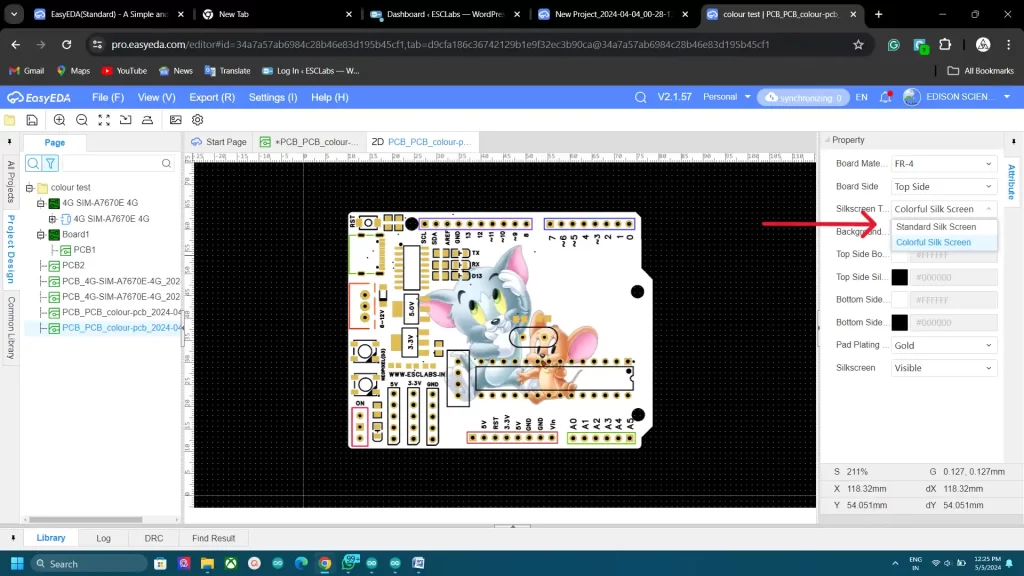
To preview this click on 2D preview and select colour silkscreen. now you can see how our PCB looks.
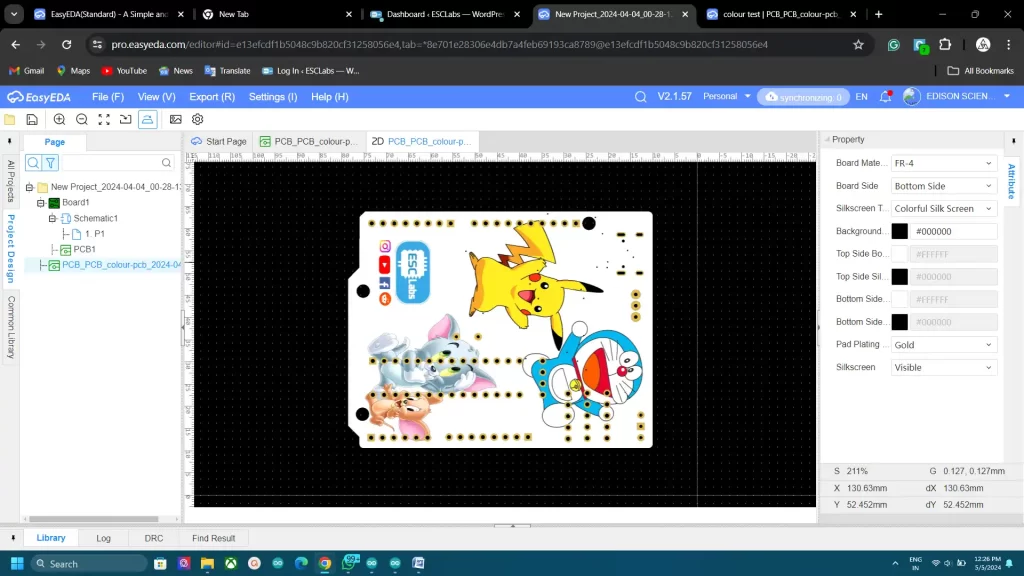
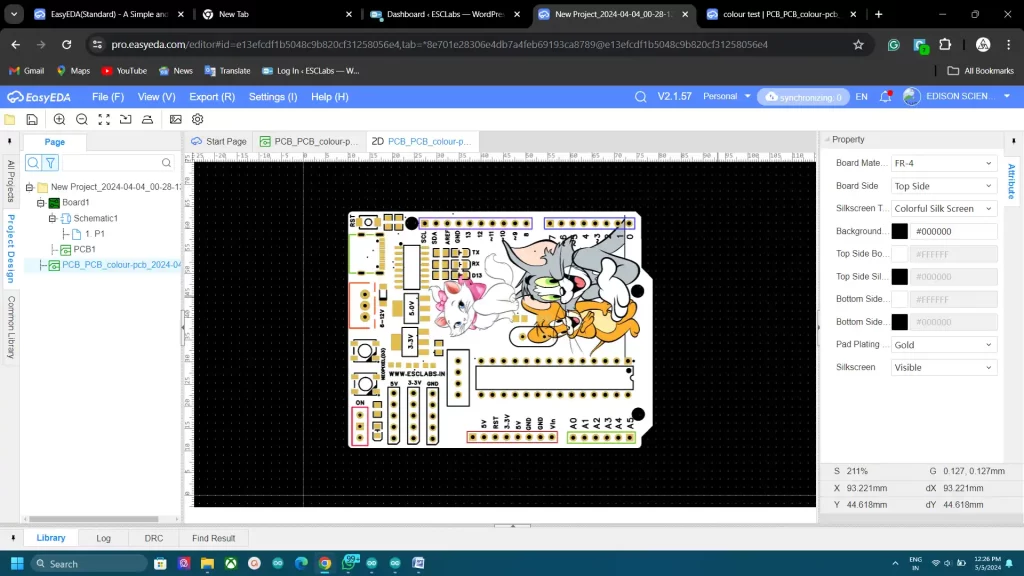
I have added some more images and my PCB looks something like this after designing.
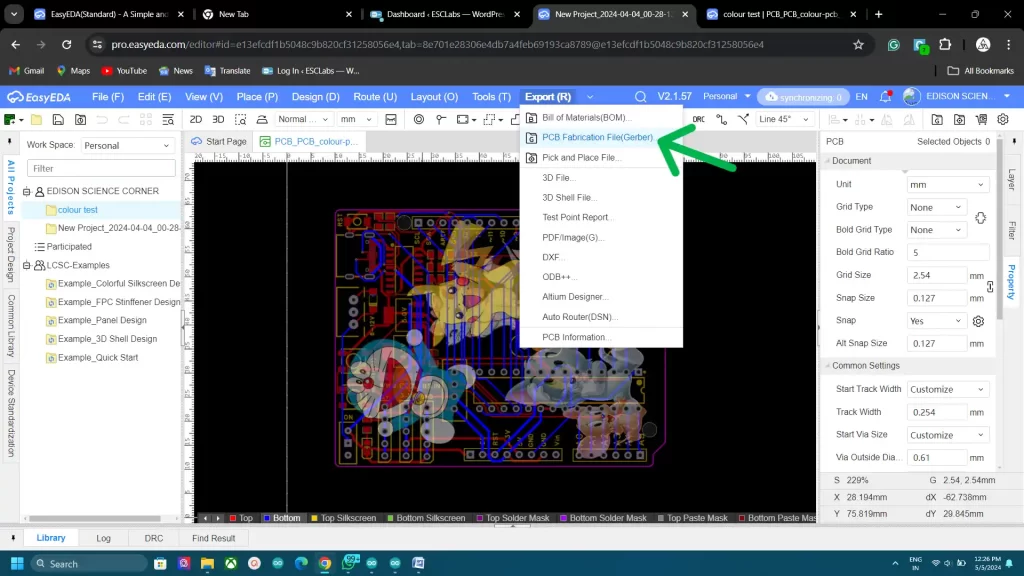

Now let’s export the gerber file. So click on export and select Gerber file- tick on the colour silkscreen option and click continue. Now the gerber file will download.
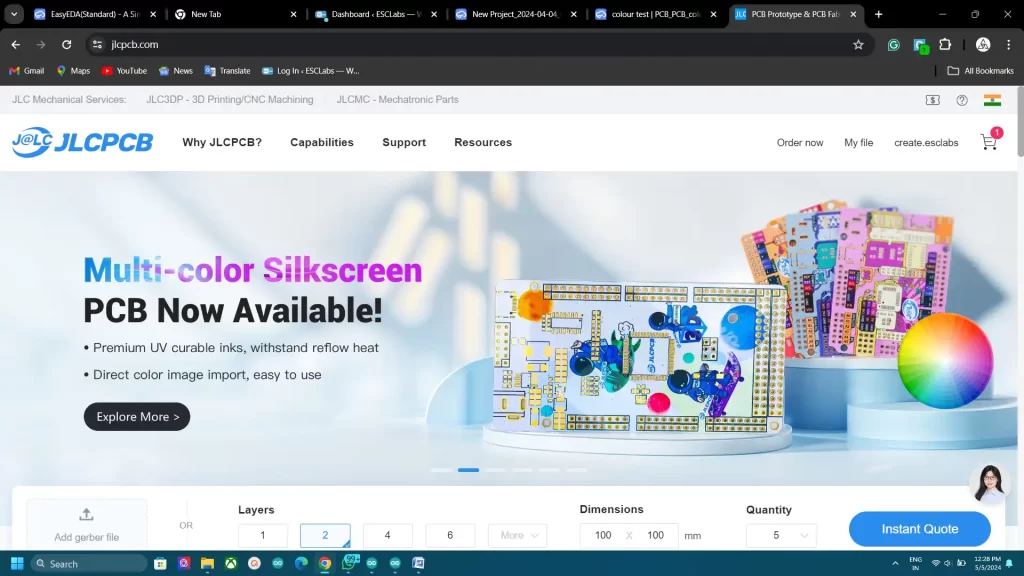
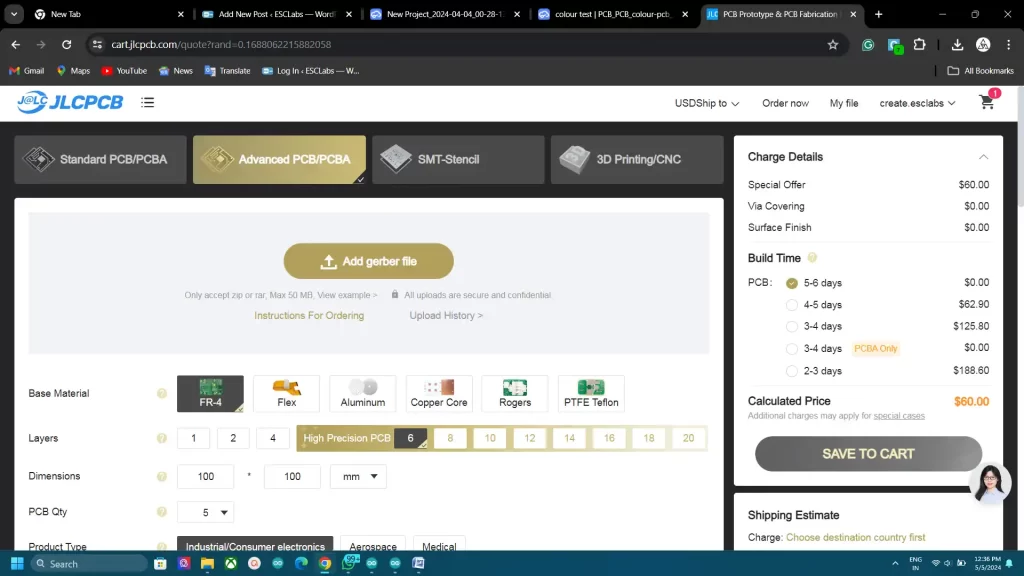
To fabricate the PCB I went to jlcpcb.com. they are the best PCB manufacturers and they offer only 2 dollars for 5 PCBs and their PCB assembly starts from zero dollars. Now they have started the multicolour silkscreen printing too. Click on Order now- select the advanced pcb option and upload the Gerber file
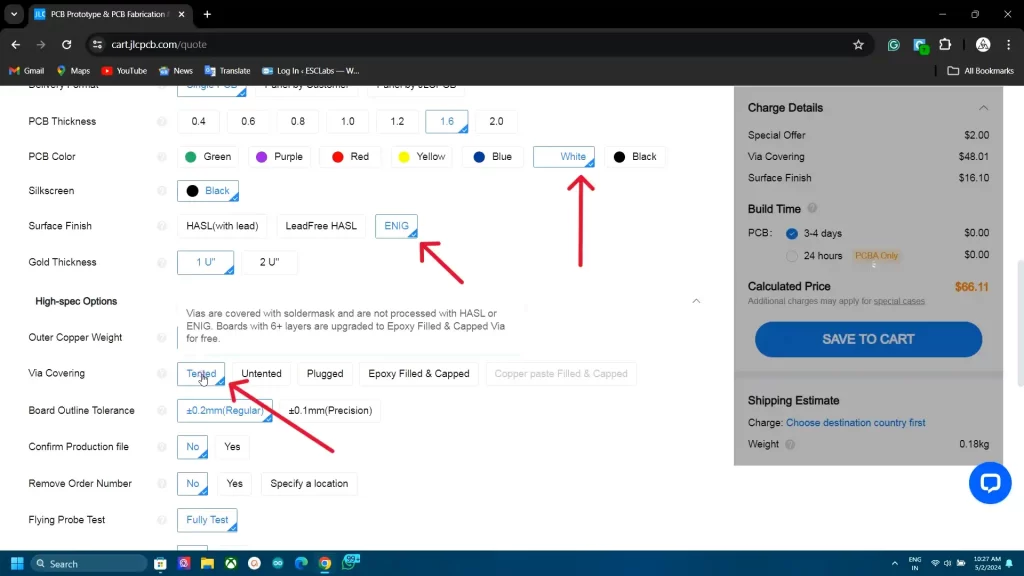
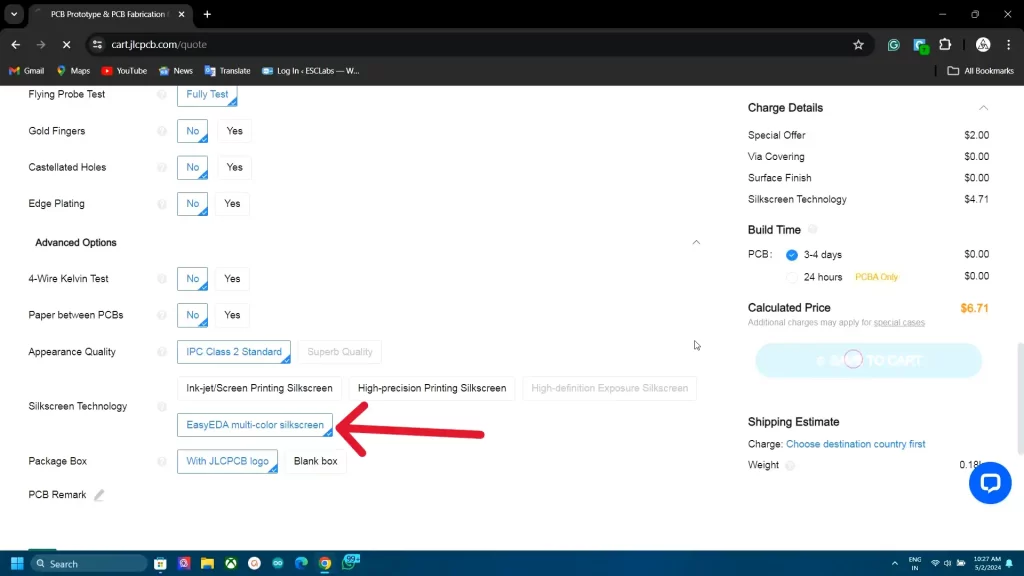
Now select white PCB colour, select ENIG surface finish, then select via covering as tented now go to advanced option and select easyeda multi colour silk screen. And that’s it. you can get 5 PCBs for 6.7$.
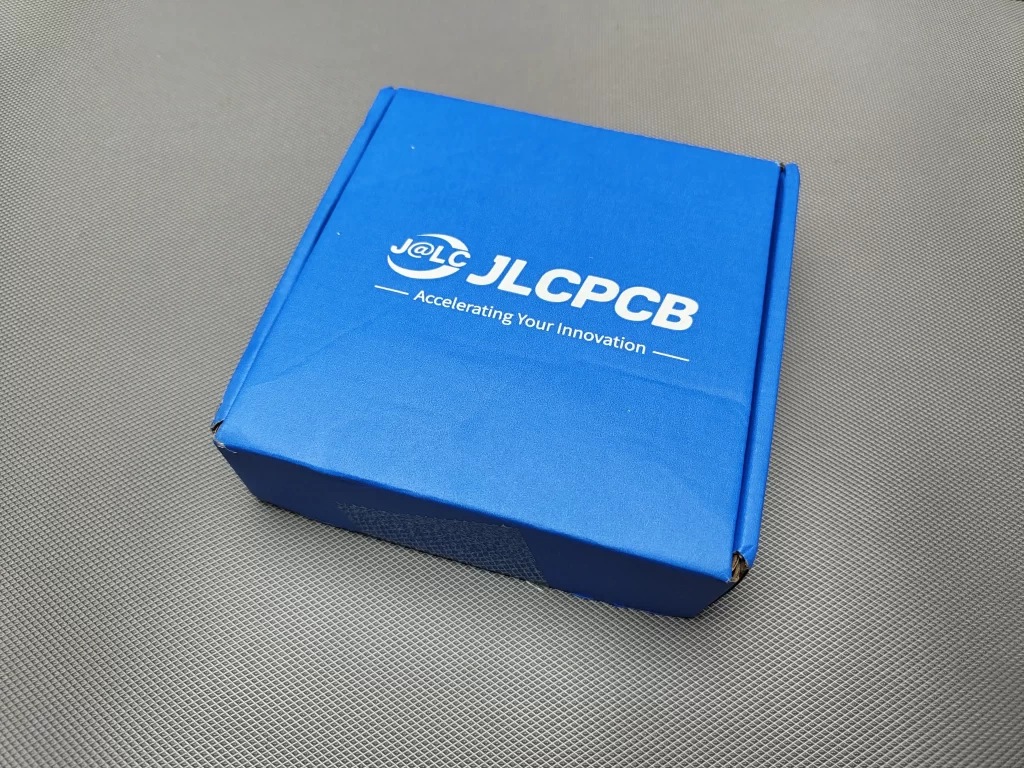
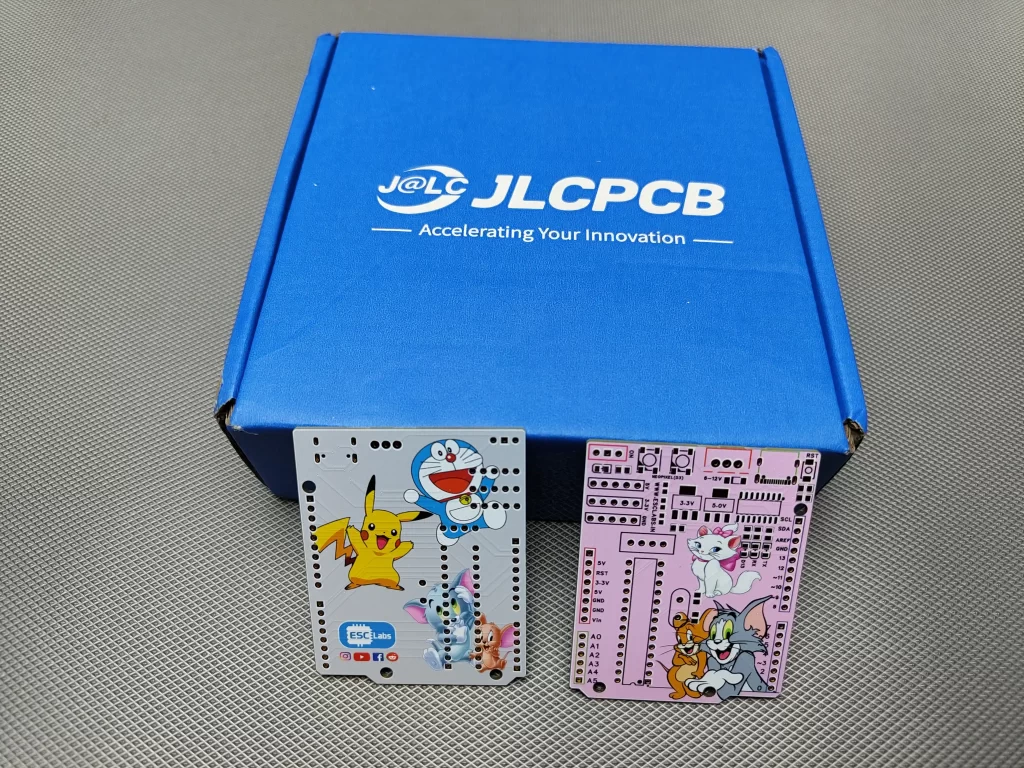

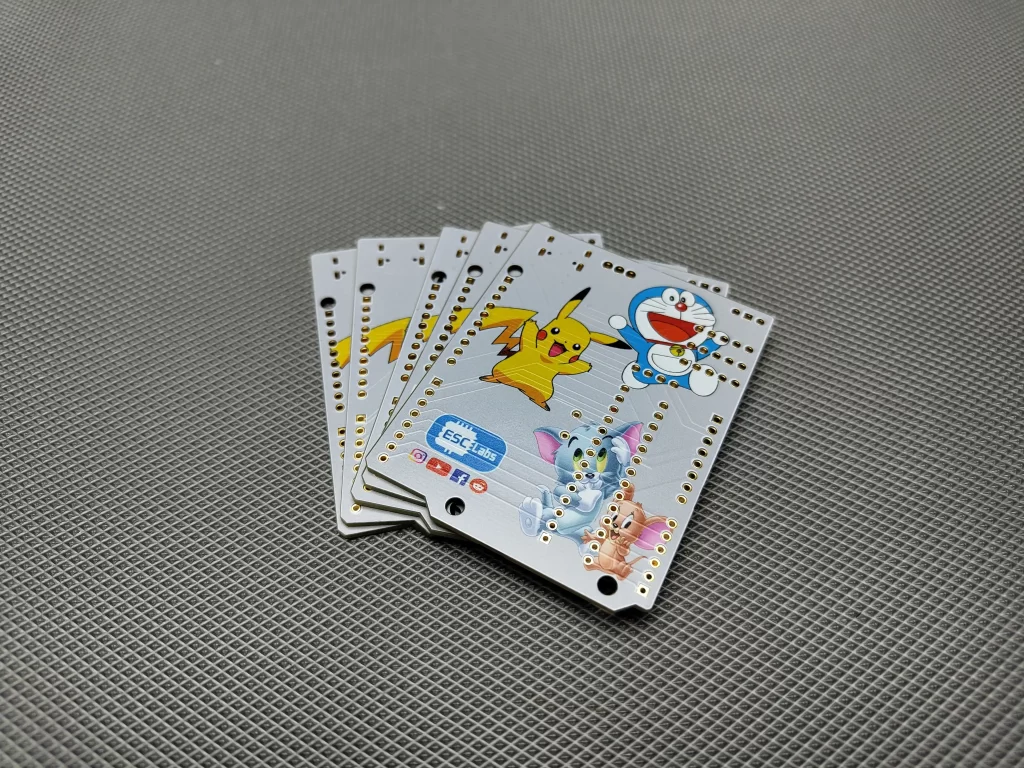
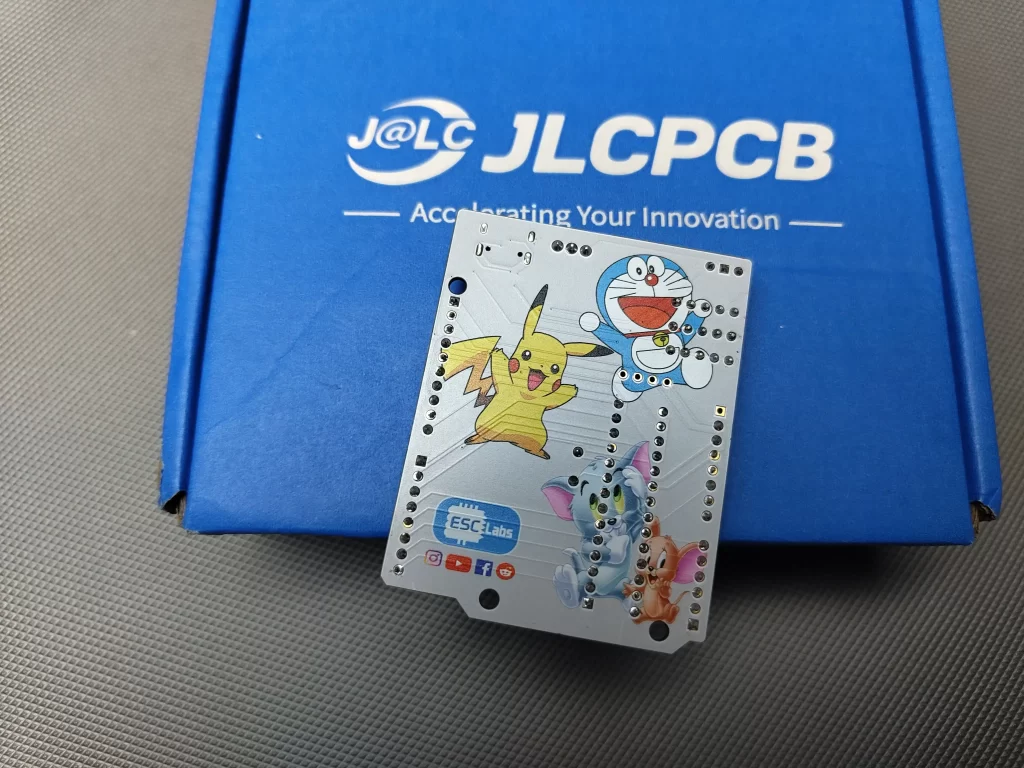
I placed the order and after 10 days I received the fabricated PCBs from jlcpcb. The PCBs are awesome. The images and the colours are beautifully and perfectly printed. Nice job jlcpcb.
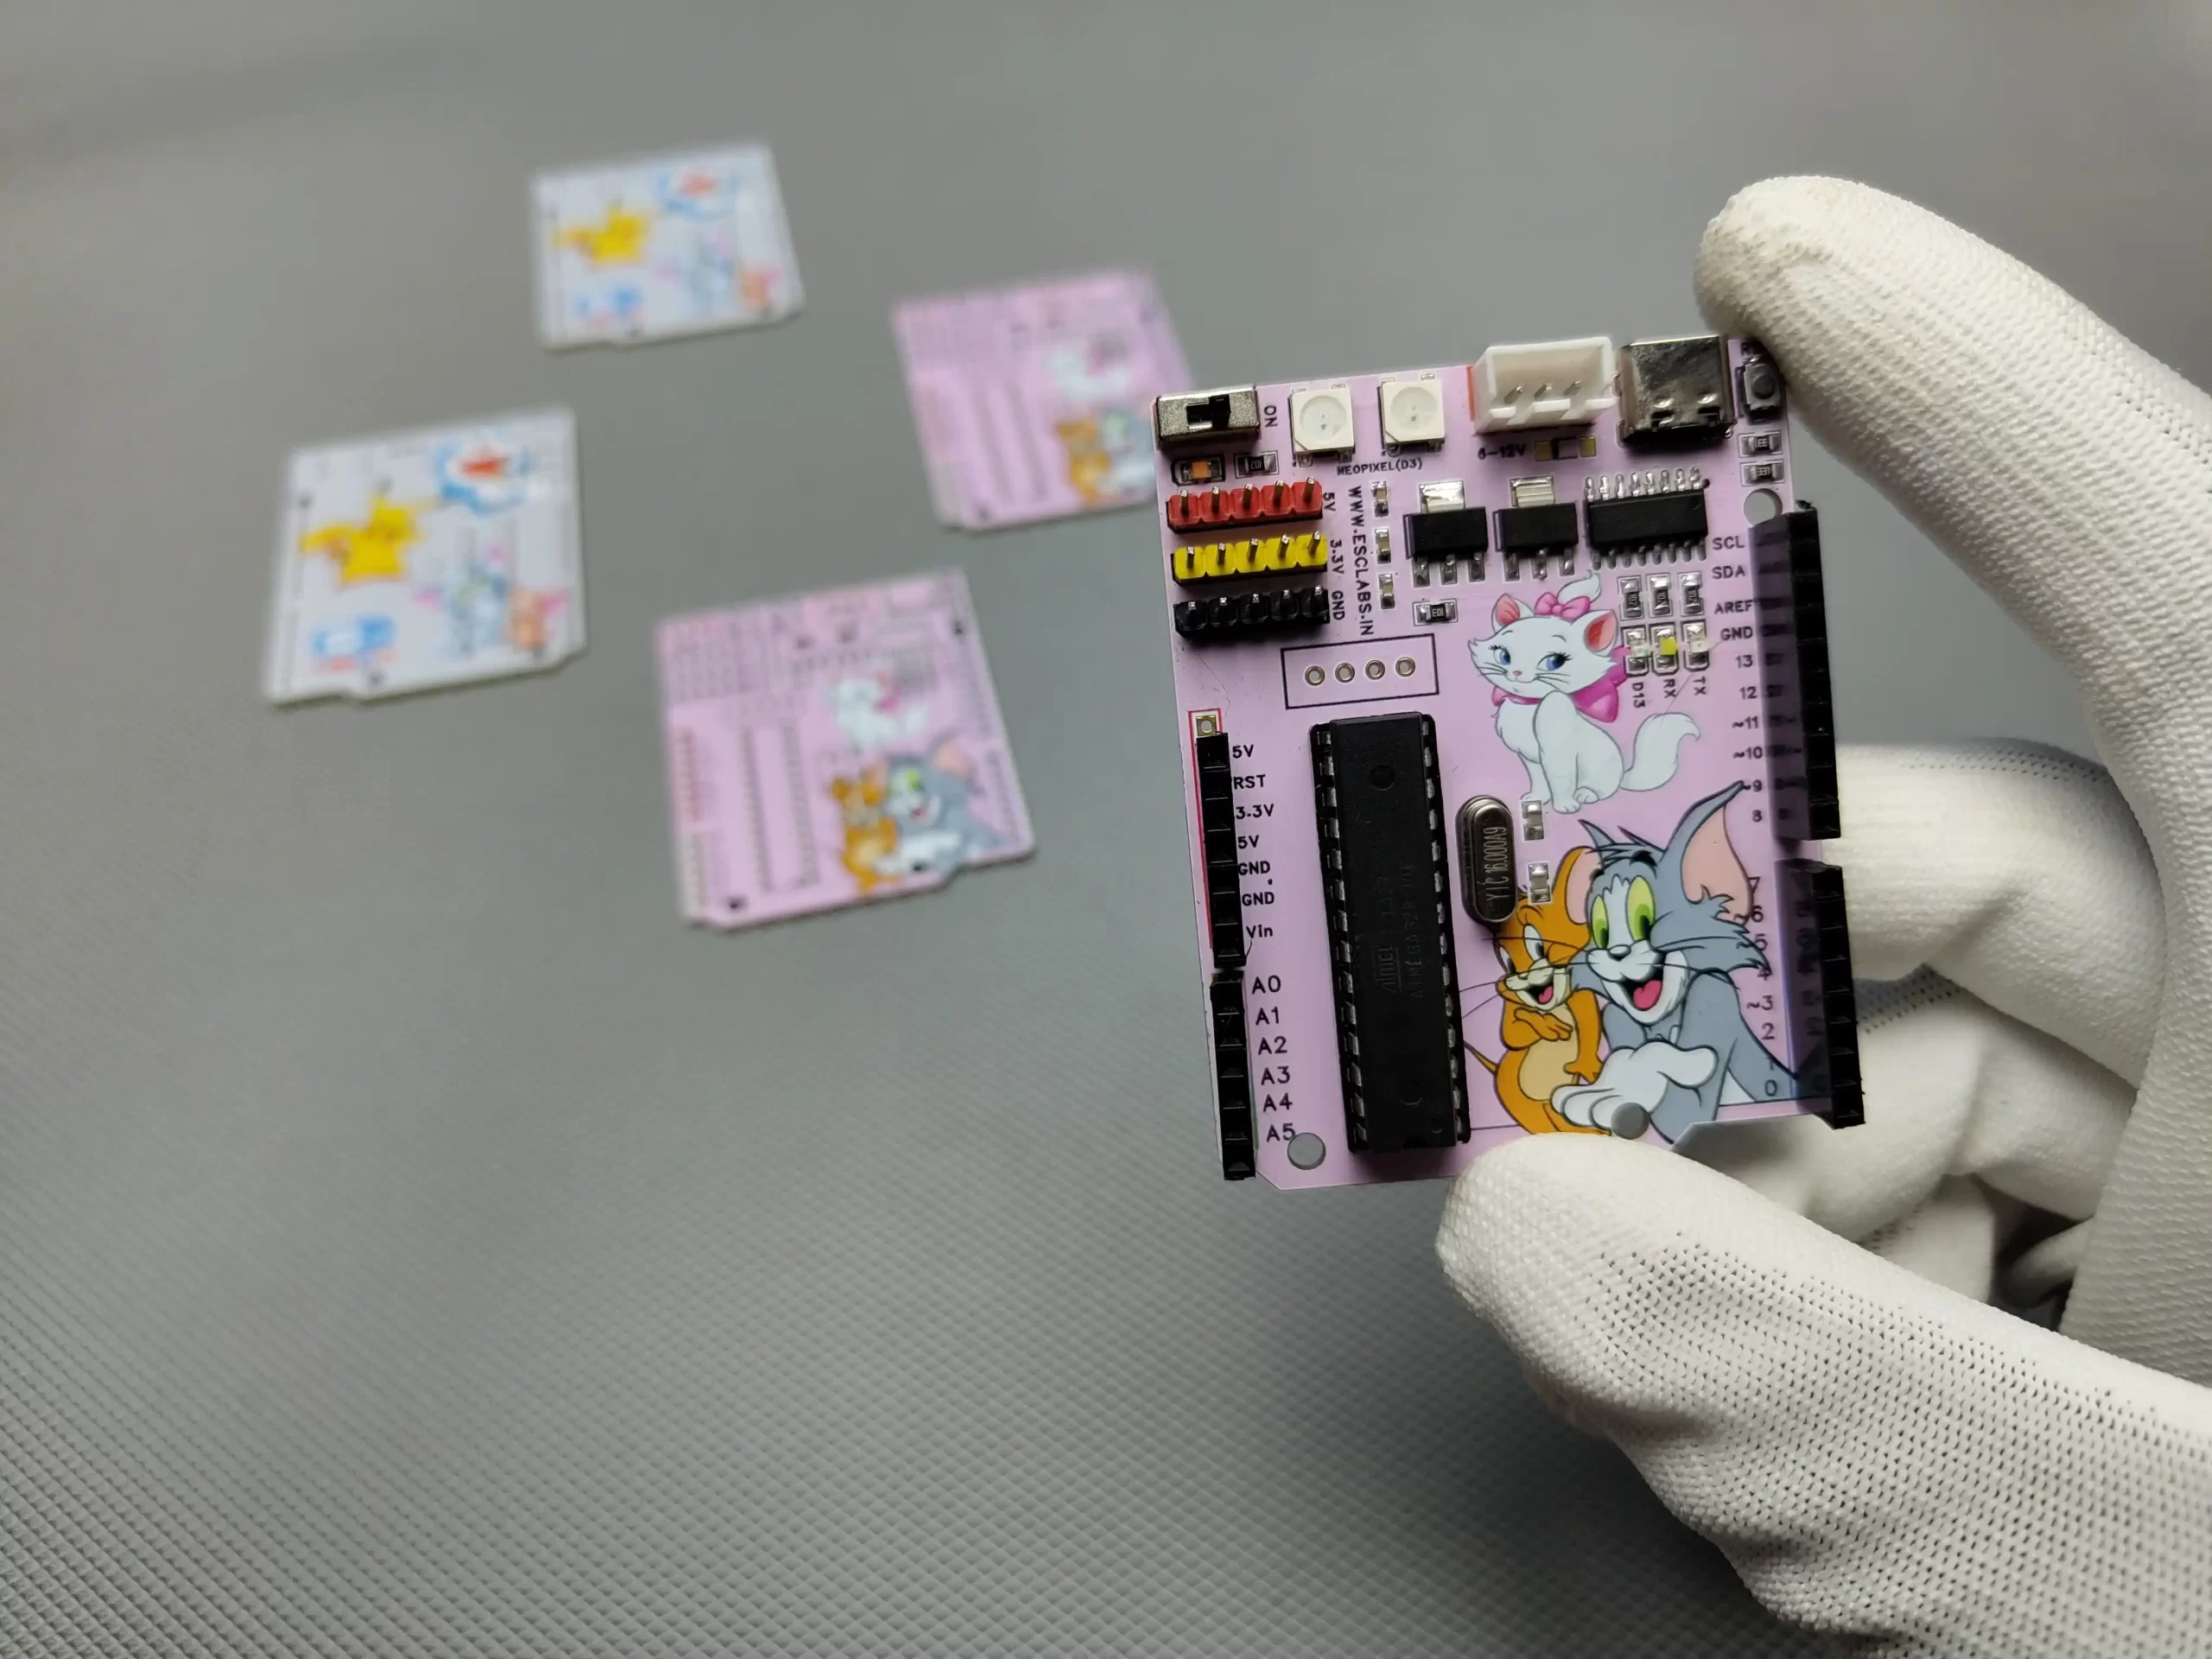

Now I grabbed all the components and started the soldering. I started with the SMD components and then soldered the through-hole components. After some time our PCB is ready. So an Arduino with Tom and teams. Nice.
Please check the video about this. So that’s it my friends. I hope you learned how you can build PCBs with multicolour, if you have any doubts you can ask in the comments section or in my socials. Bye bye.

Leave a comment